Every repost is a repost repost. I’ve moved this over from my tumblr/Obsidian file because it was… excessive.
So I know some time back people were curious of my deranged setup that allows me to take pretty pictures so I tried to put together a post of my graphics setup
I have old imgsli pictures and whatever else screenshots all over the place, I apologize. This is really long and I hope that you, dear reader, can get something out of this.
I’ve given up at figuring this out at the moment since I’m going to be occupied with work for the next week, but will make updates as needed
Disclaimer:
Modded setup was initially 9800x3d + 4070ti super, now using 9800x3d + 5090, all with a basic undervolt, with a 60hz 4k TV
Graphics Mods:
Reframework https://www.nexusmods.com/dragonsdogma2/mods/8
- Required for pretty much everything. I use Version 01105 https://github.com/praydog/REFramework-nightly/releases/tag/nightly-01105-29ed2062312581f7c62ae603bbe5f6e90b9acb06 because more recent ones messed with the text size of the UI in some windows
Better Shadow Filtering https://www.nexusmods.com/dragonsdogma2/mods/489?tab=description replaced by Graphics Suite Lite’s shadow settings, haven’t seen much difference between the two
Using modded version seen in the comments, can alternatively use Graphic Suite Lite’s setting
Unofficial Texture Patch https://www.nexusmods.com/dragonsdogma2/mods/766
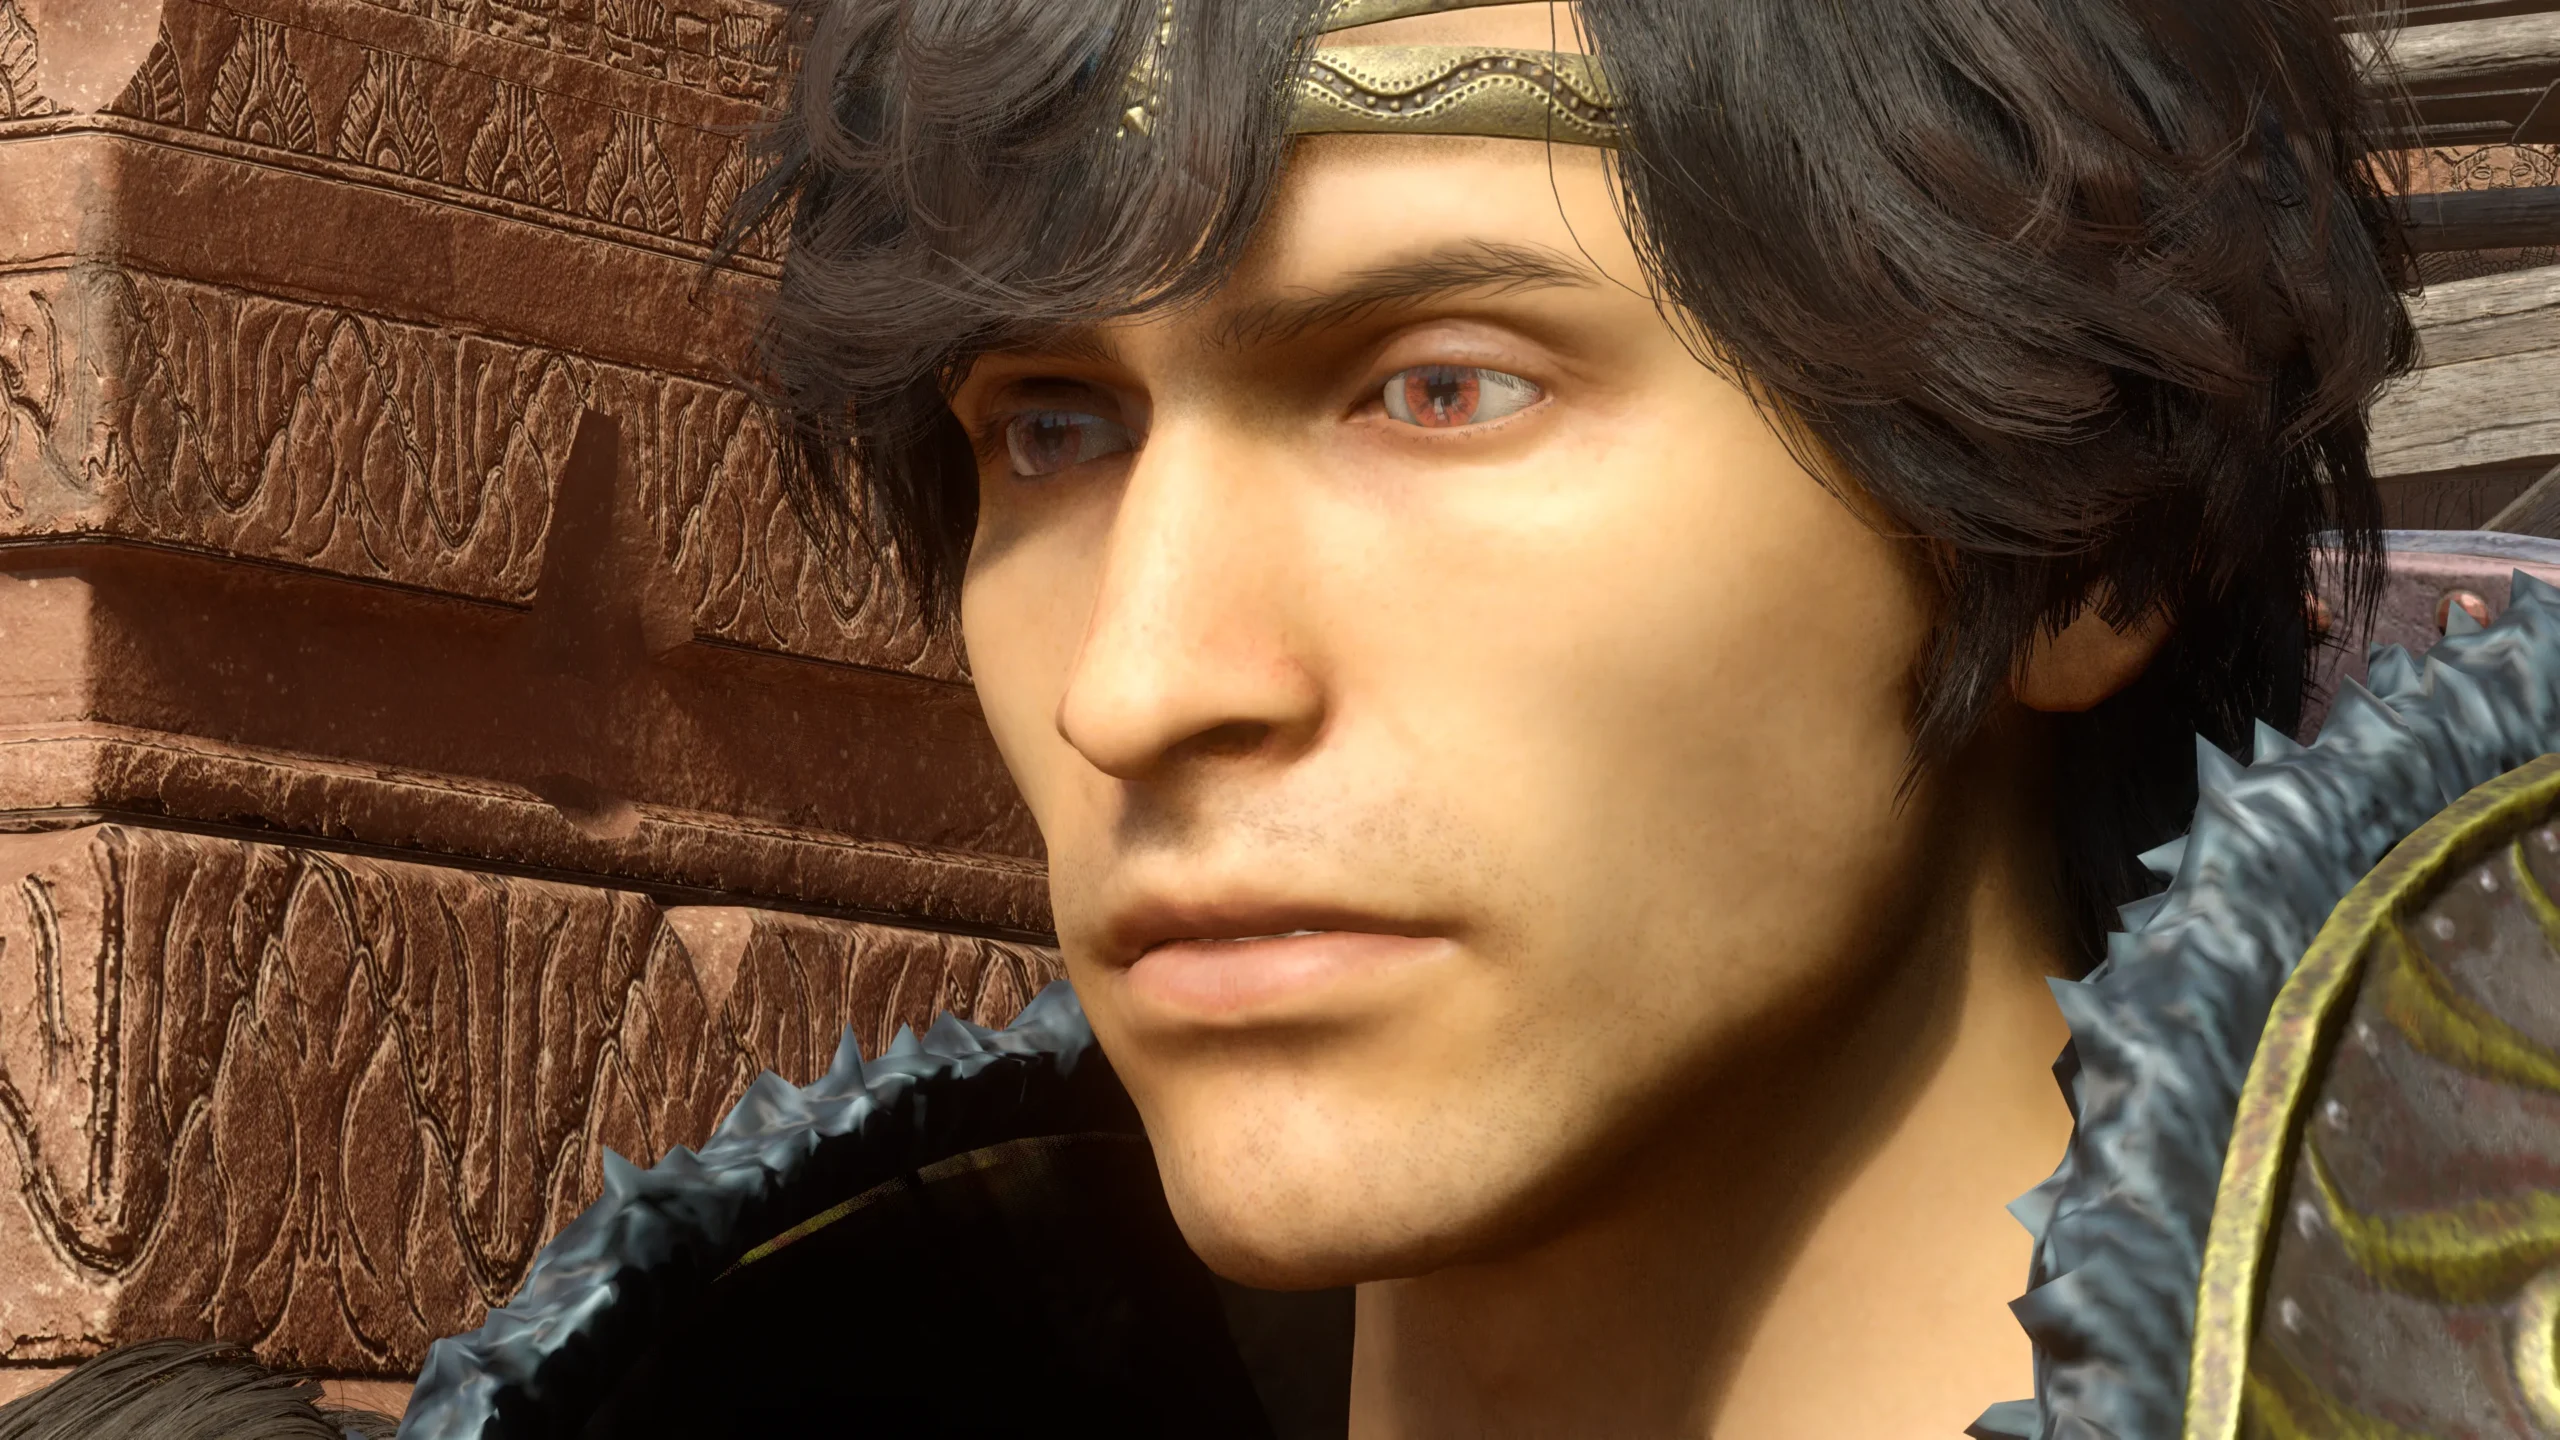
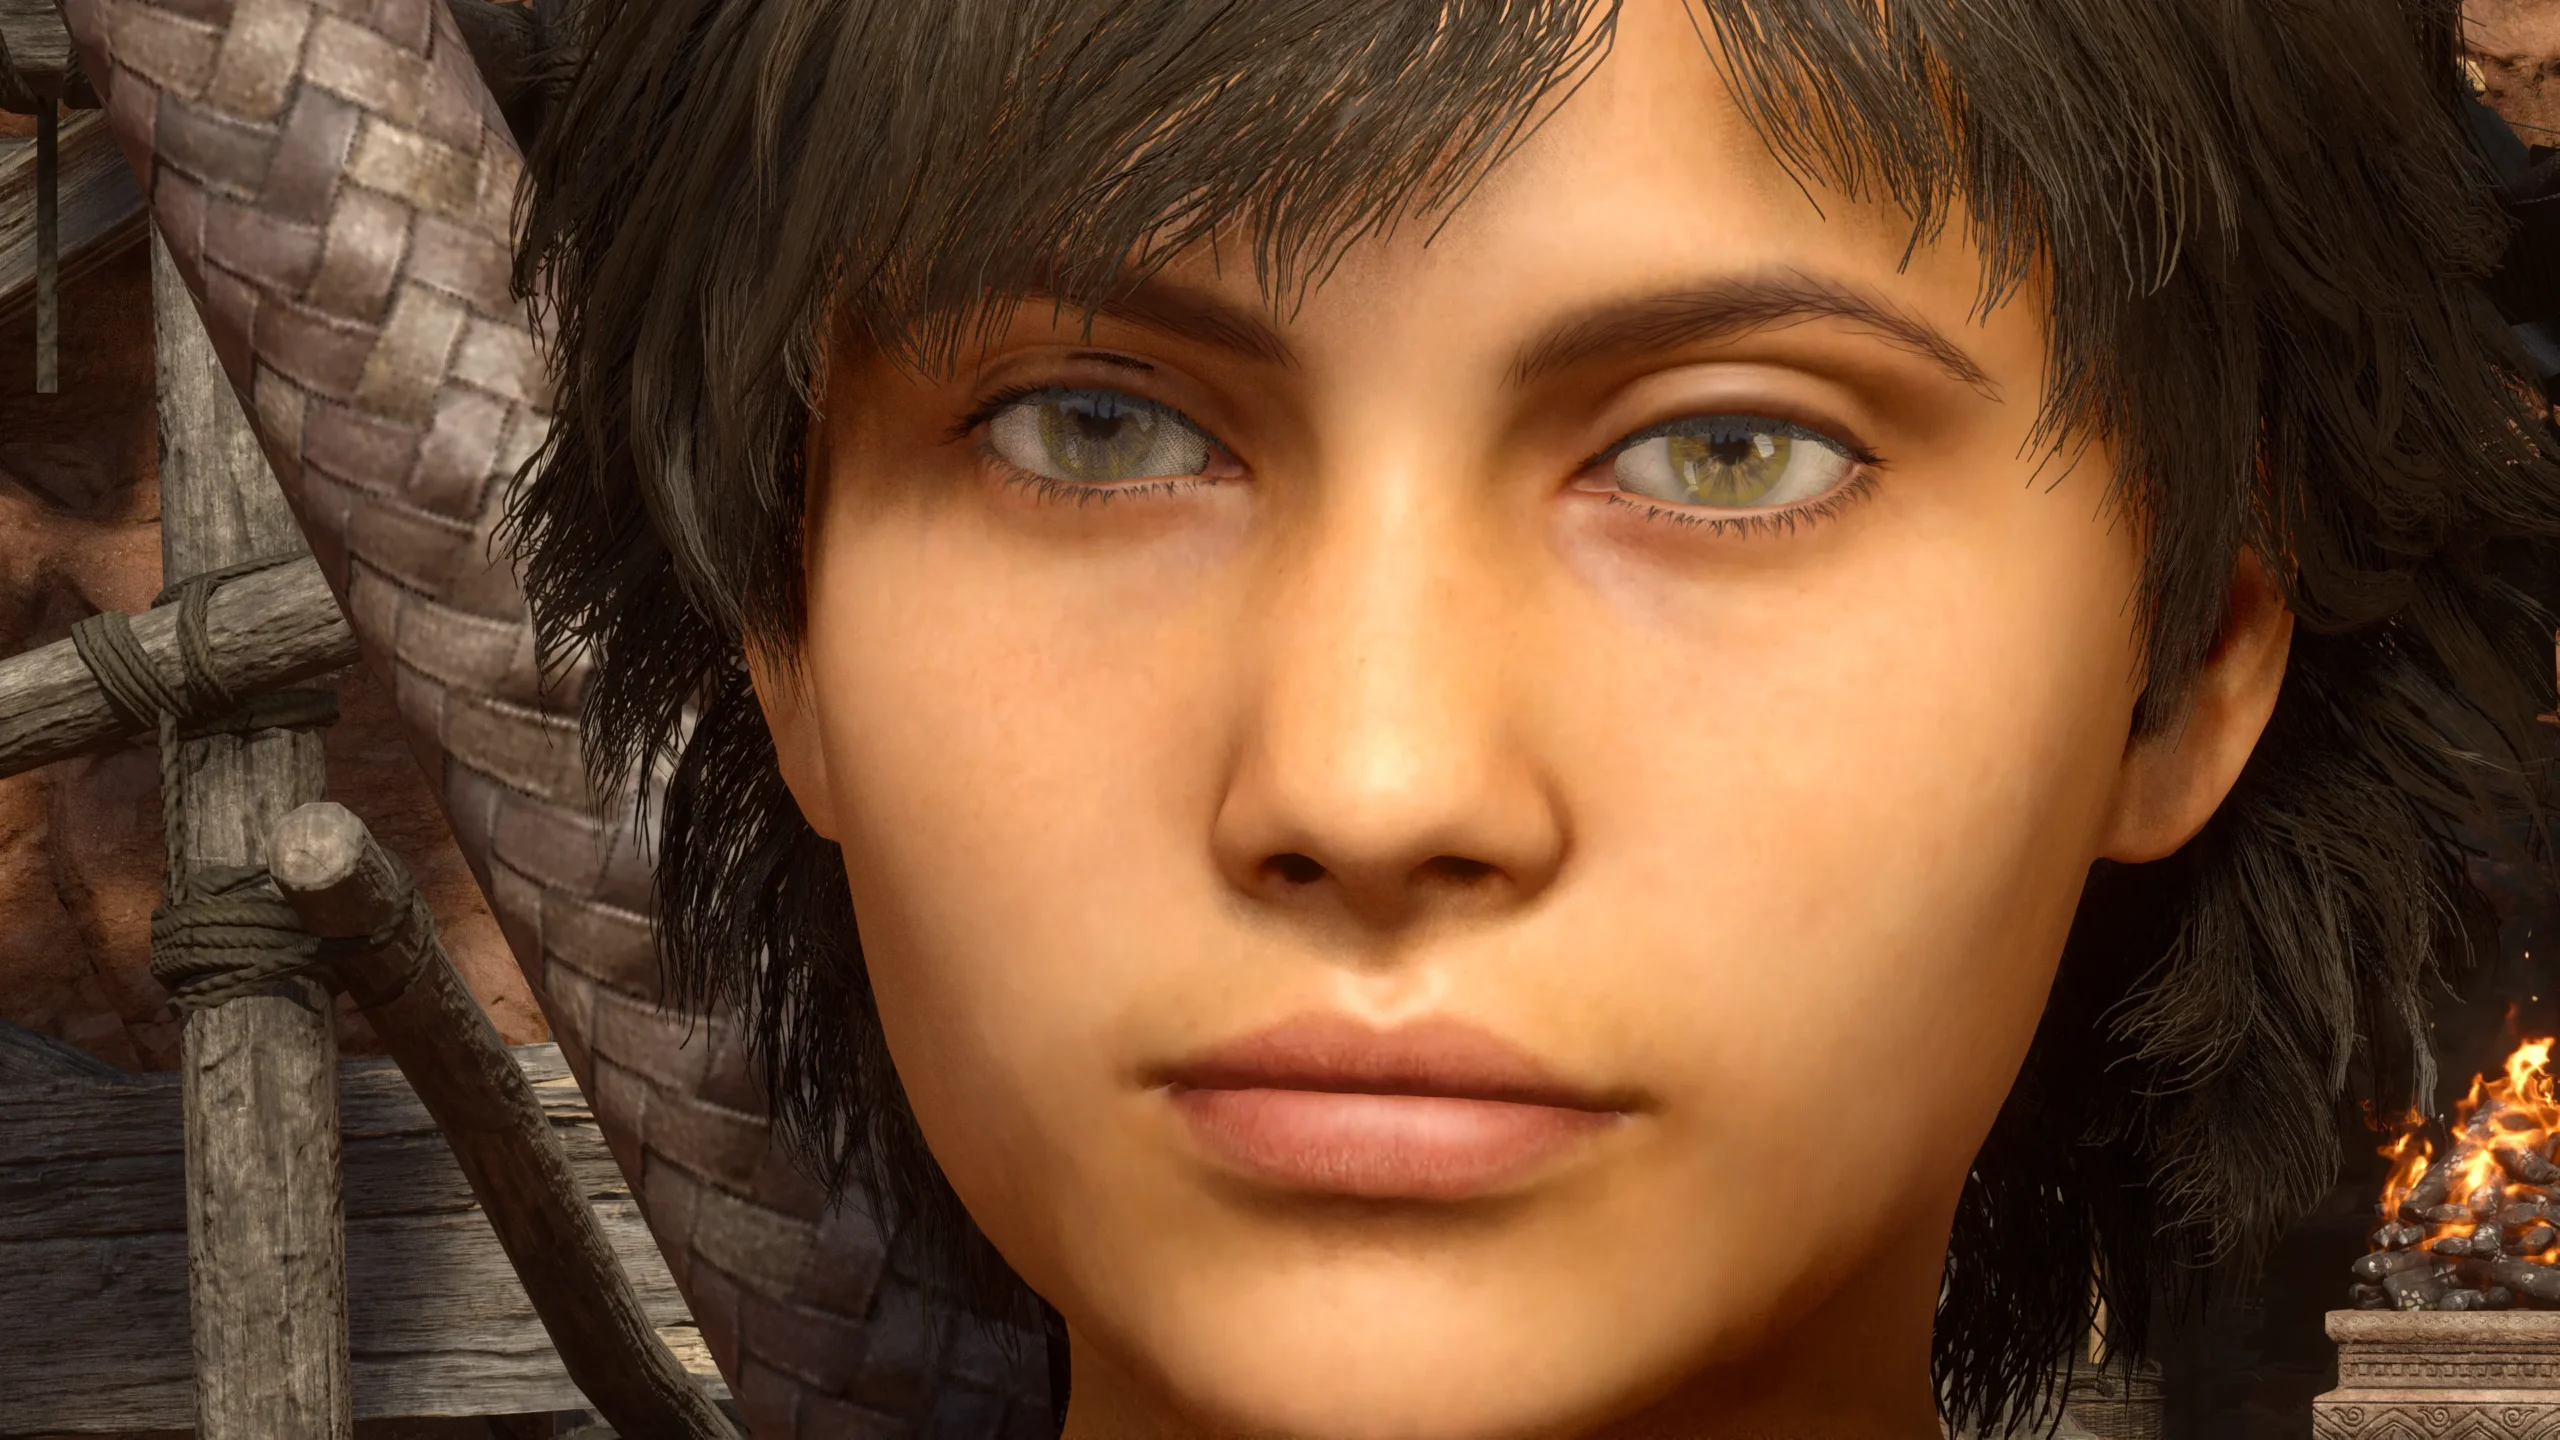
- Changes are most noticeable with skin patch, where fine lines, pores, and skin under the brows are sharper

BetterUI Series https://www.nexusmods.com/profile/Caites/mods?gameId=6234
- For changing up the UI
HUD Control https://www.nexusmods.com/dragonsdogma2/mods/105
- For making different components conditional (like turning on health/stamina bars, pawn names and health bars only during battle) instead of turning them off completely in the menu
Freecam mod on Haven’s Night https://discord.gg/9Vr2SJ3
- More control than REFramework’s freecam, however controller lacks a deadzone
Otis_Inf Freecam https://opm.fransbouma.com/igcsdof.htm https://www.patreon.com/cw/Otis_Inf
- This is a paid mod, however it’s worth it to me
- Freecam with smoother controller use and additional tools such as locking the camera position, turning game input on/off, removing HUD in live gameplay, allows setting camera speed/zoom, raising and lowering camera from a fixed point, zoom = FOV. Plus allows use of the IGCS DOF Reshade Addon.
- Sometimes I lock the camera in place and re-enable game input to use photo mode settings or have it locked in live gameplay. Or I remove the UI and disable game input so that I can take screenshots in conversations.
- Also, this is another program to open after starting DD2 if that’s a problem. I sometimes forget and sometimes if IGCS is installed the picture won’t show until you start the program :’)
r457’s Camera Control Mods https://www.nexusmods.com/profile/r457/mods?gameId=6234
- For better M+K controls and camera positioning tweaks (will alter camera position in Photo Mode as well)
- I use True Shoulder Camera however there is a more customizable improved Camera module in the DD2 Tools mod
ReLit https://framedsc.com/GeneralGuides/relit.htm https://github.com/originalnicodr/RELit
- I usually stick to the game’s natural lighting during the day but it’s a good supplement and it helps when I’m tinkering with equips and whatever in realtime because of the passage of time. I also find it useful at night/indoors/darker areas and for manipulation of light sources.
- You can also turn off Auto Exposure and adjust it yourself while taking screenshots. I don’t utilize it enough.
Graphics Suite https://www.nexusmods.com/dragonsdogma2/mods/1283
- Graphics Suite Lite exists and has removed the need for Quality Water, Quality Raytracing, and Tint Remover. Latest update has shadow filtering but I find I prefer enhanced shadow filtering due to how you can adjust the variance/softening of edges. This, subsurface scattering and fixed contact shadows make a difference even in vanilla raytracing. Makes skin soft and adds dimension to characters and environment
- Note: Disabling postprocessing filter will remove the in game filters in Photo Mode so re-enable it when you want to use them
DD2 Utility Pack https://www.nexusmods.com/dragonsdogma2/mods/1317
3/24/2026 – Modules turned out to be a crapshoot per Nickesponja’s peek at the code, he uploaded a possibly fixed version on Discord but Mura mentioned it crashed around cutscenes. Still testing his version currently
No Vignette from Stash of the Sovran https://www.nexusmods.com/dragonsdogma2/mods/1143?tab=files
3/24/2026 – Totally forgot this one. Keeps the vignette but tones it down a lot in live gameplay. Still need to turn it off in photo mode.
Reshade:
HDR – Better HDR https://www.nexusmods.com/dragonsdogma2/mods/188
It did not mention anything about disabling the postprocessing filter but I did and I liked the result. Have been tweaking the values though, specifically reducing midtone saturation and increasing vibrance
HDR – RenoDX https://www.nexusmods.com/dragonsdogma2/mods/1325?tab=description
3/25/2026 – Renders Better HDR moot, if you go with that disregard this. It’s by the same author so they’ll look pretty similar as well. You can still tweak shadows/highlights/saturation/film grain in the settings. I went with the RenoDX ACES version over Vanilla+ as it makes the output actually not washed out. My hard drive is thankful, and my Reshade kit only includes IGCS and the AspectRatioMultigrid shaders now
or
SDR – Clean Light Reshade https://www.nexusmods.com/dragonsdogma2/mods/353
- Clean Light states it requires RE4 Tint Remover, however Graphics Suite Lite can also disable the postprocessing filter and includes other tweaks specific to DD2 so Tint Remover is no longer needed
I ran both Reshade presets together for giggles and everything went off the rails vivid
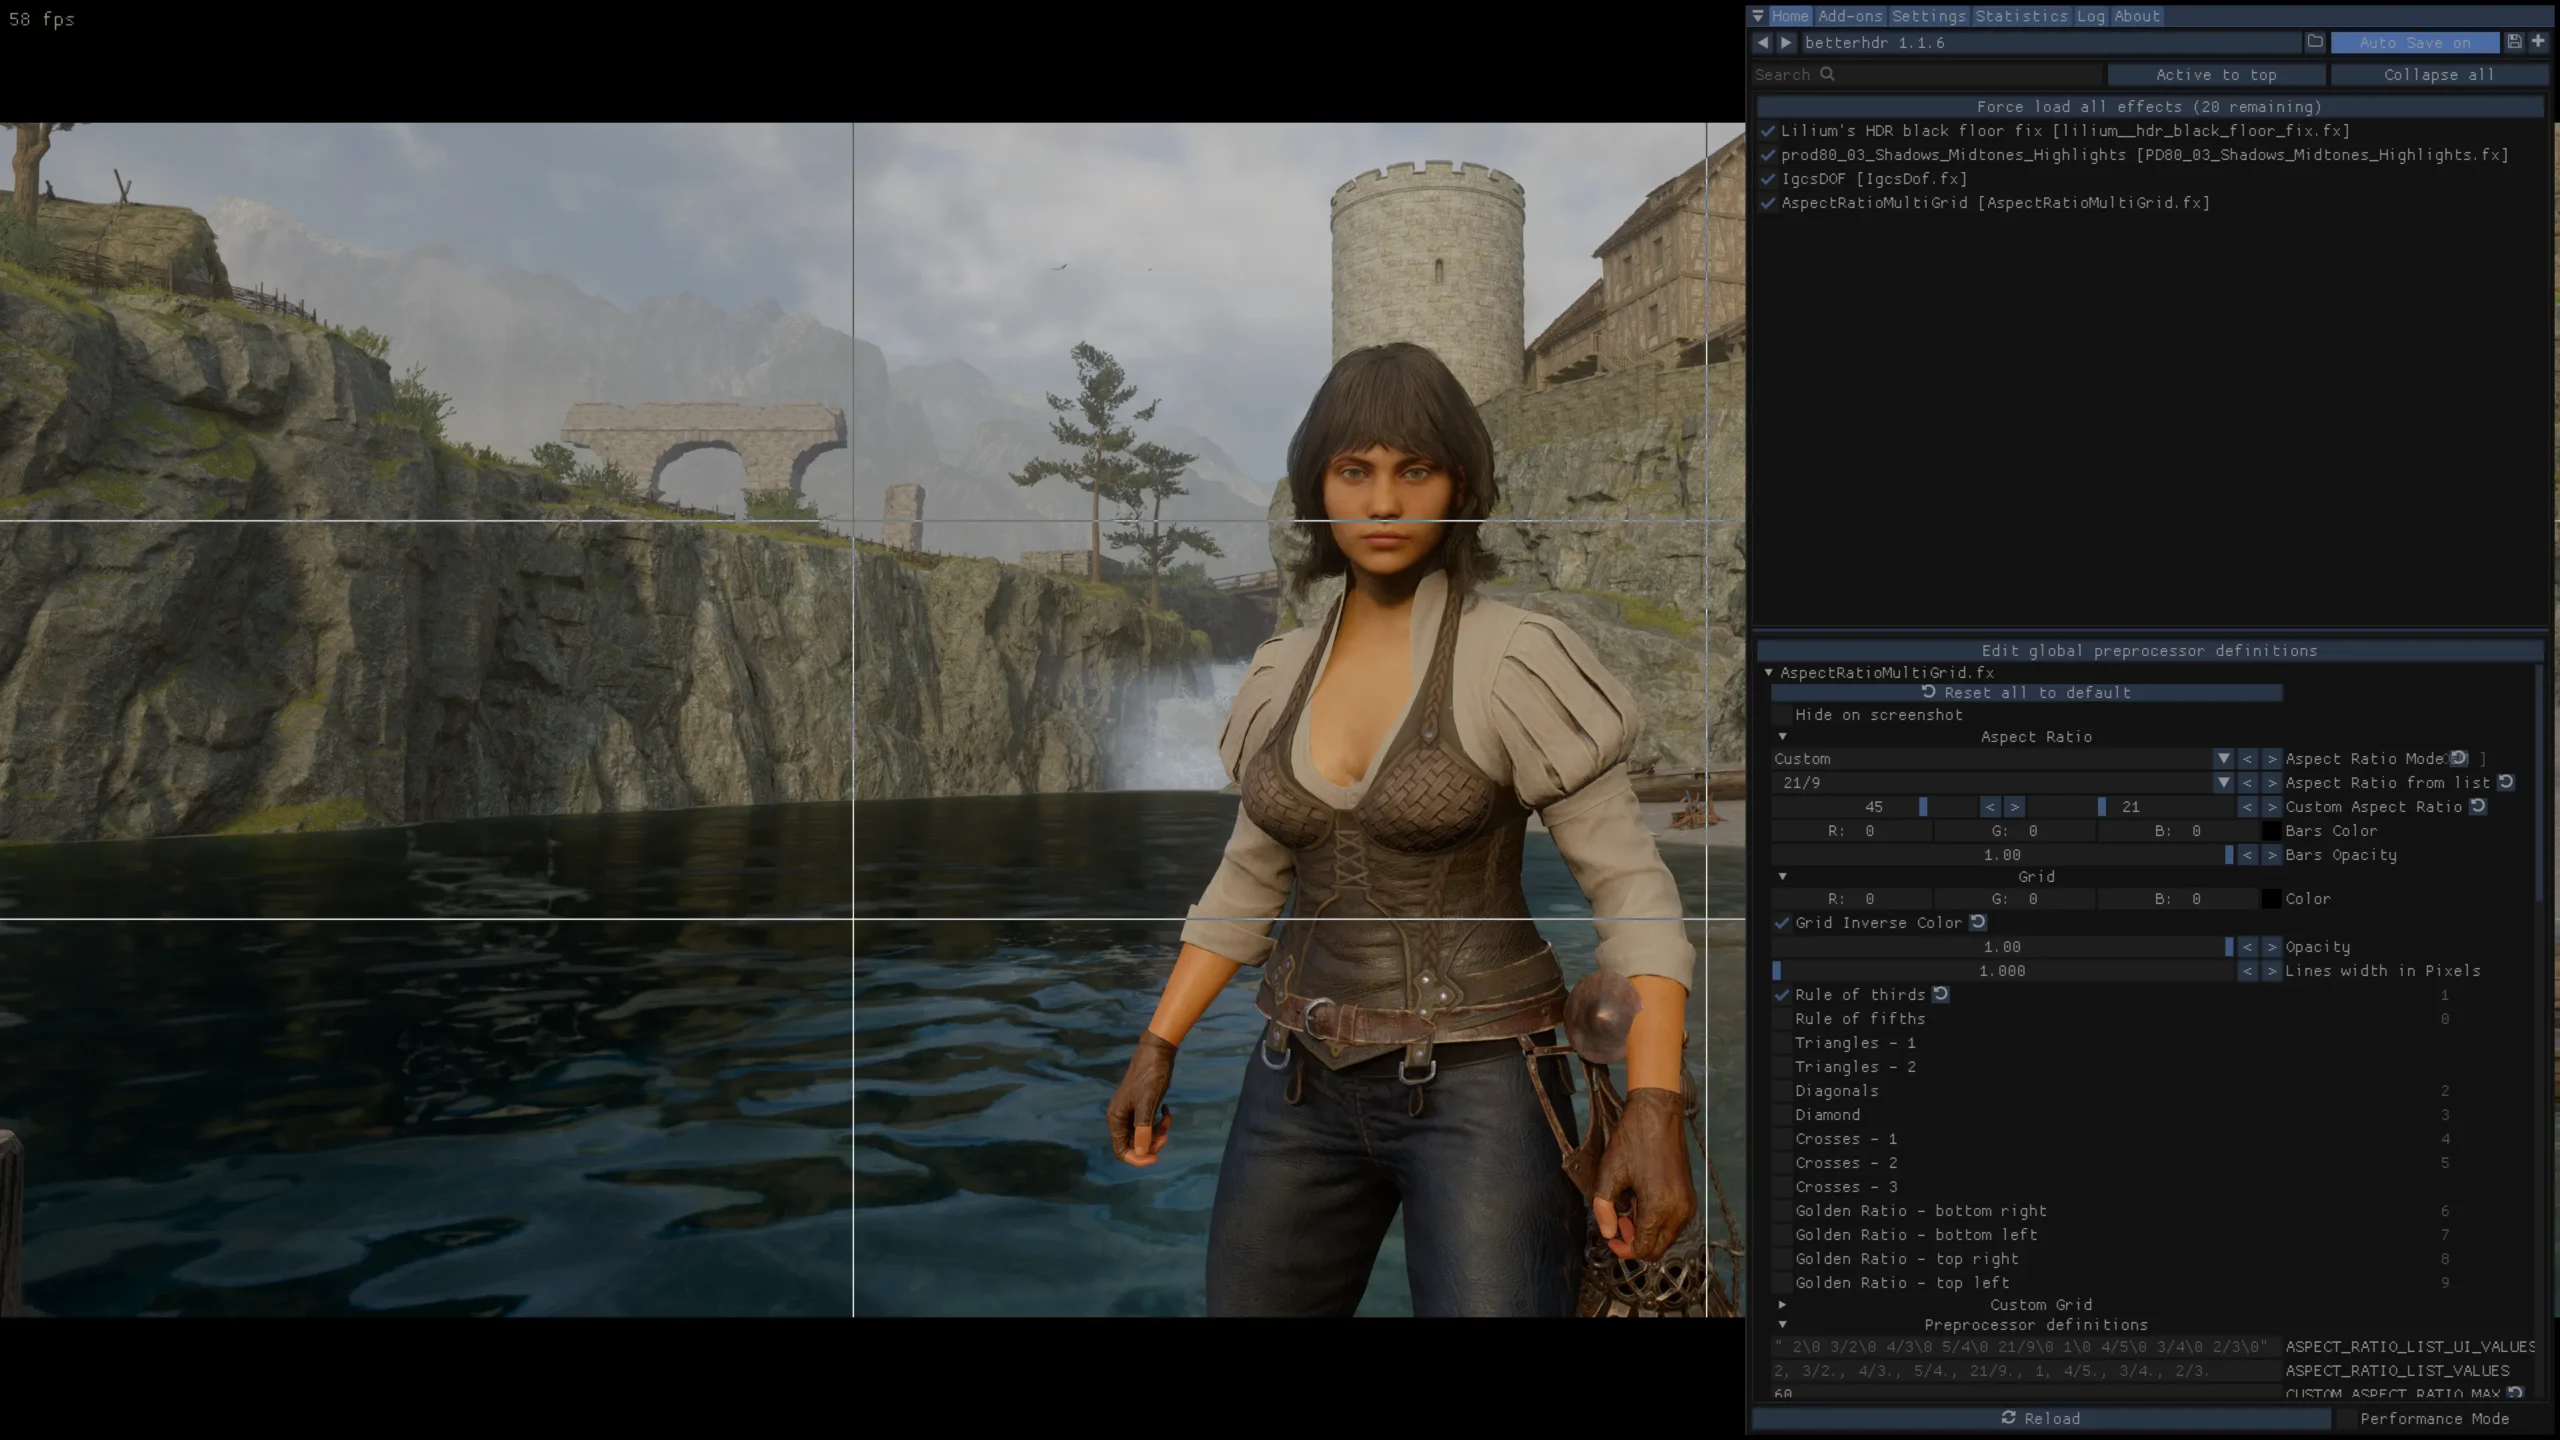
Additional Reshade Shaders:
AspectRatioMultiGrid.fx
- Custom ratio 45:21 is similar to in game Photo Mode’s Letterbox frame
- Listed ratio 2 is the usual cinematic ratio and 21:9 is ultawide
- I like this one because you can use the ratios on top of the game so that the borders don’t get smeared if the ICGS DoF tool is used or even just customizing it with more frames than available in the game’s Photo Mode. I also take advantage of the grid tools when taking screenshots (Rule of Thirds, etc), and have my most used grids assigned to hotkeys
- Also, by setting the ratio similarly to DD2’s photomode one, I can use it in live gameplay with HUD Control and disabling some parts of the UI. If I need to peek at my health bar or the boss’ health bar, I just turn toggle the frame.
IgcsDof.fx (IGCS through Reshade with Addon installer)
- This addon allows use of Depth of Field tool with Otis Freecam (required), useful in reducing noise/smoothing out edges
lilium__hdr_and_sdr_analysis.fx
- For any calibration you want to do such as editing the Black Floor Fix installed in Better HDR or just messing with settings in general
DLSS:
https://www.nexusmods.com/dragonsdogma2/mods/129 includes instructions to run it with Reshade
DLSS Presets:
Default is Preset C
I use Preset E via DLSSTweaks (refer to above) for Quality/Balanced settings, Preset L for Performance/Ultra Performance
How trying Presets K and L went for me:
- K:
- Pointillism, oversharpening noise resulting in flashing/flickering especially in shadowed areas like the shops in bakbattahl, migraines and sadness
- L:
- Sharper and differences in lighting (presumably from the autoexposure I couldn’t turn off at time of writing). The added autoexposure/lighting is actually pretty nice but in some aspects it might have reduced contrast.
- The noise can get pretty bad and flickery like Preset K in some shadowed areas and definitely in forests/foliage. The denoiser can also result in the opposite effect where everything gets smeared or the noise still flickers but is smeared.
- 3/24/2026 – Preset L in performance works well with ASVGF. Hybrid PT is terribad in forested areas where everything smears. But yeah, very usable in vanilla raytracing.
I didn’t test Preset M much but I think it was a similar thing
https://imgsli.com/NDQ4MTc0
https://imgsli.com/NDQ4MTU1
https://imgsli.com/NDQ4MTc3
https://imgsli.com/NDQ4MTU2
My attempts to run Frame Generation crashed the game. Maybe others can get it to work but there’s no point for me because my TV is only 60hz 🙂
Per Optiscaler https://github.com/optiscaler/OptiScaler/wiki/Dragons-Dogma-2
- The Quality and Performance settings are reversed, so if you want Quality you need to set the in game option to Performance and vice versa. You can confirm by enabling the DLSS Overlay and looking to the bottom left corner which will give information on preset letter, resolution, whether autoexposure is on or off, if framegen is running, etc
Special K can be run with DLSS and Reshade but I was not able to get it to work with Otis Freecam. I think it was convoluted getting all the dlls to run together anyway
Settings:
In-Game Settings
Display Mode=Borderless Window
Screen Resolution=3840×2160
This on top of the 4spp will reduce noise, though it is resource intensive
DLSS Super Resolution=Performance (because it actually sets it to Quality)
Upscale Sharpness=Default (in the middle)
Screen Space Reflections=On
Mesh Quality=Max
Texture Filtering=High (ANISO x16)
Texture Quality=High (3 GB)
Grass/Tree Quality=High
Resource-Intense Effects Quality=High
Shadow Quality=Max
Shadow Cache=On
Contact Shadows=On
Motion Blur=Off
Bloom=On
Depth of Field=On
Lens Flare=On
Lens Distortion=Off
Subsurface Scattering=On
Motion Quality=High
PCGamingWiki offered some driver-side tweaks which may or may not be of interest https://www.pcgamingwiki.com/wiki/Nvidia_Profile_Inspector
I used the Anisotropic Texture Filtering tweaks from here in case drivers were better than DD2’s implementation. Maybe not?
Also per this thread in /r/nvidia dated 3/25/26, apparently default shader cache size was increased to 16gb except that isn’t a setting in Nvidia Control Panel. Other suggestions said 100gb shader cache should be good especially if you play a variety of games. I had mine set to 10gb through Control Panel and uh, my shader cache folder was maxxed out. Might be a reason I had some stuttering lately. Increased to 100gb, hopefully it’ll help.
Credit to heyjoehun81 https://www.nexusmods.com/dragonsdogma2/mods/793?tab=description
For providing a few tweaks and suggestions. Biggest one is making sure that the ParallelBuildProcessorCount is correct!!
I noticed in the config.ini file that there is a film grain setting that you can change to OFF. I couldn’t tell if it worked because the path tracing noise is practically the same thing but I turned it off anyway. A reshade shader can probably add the film grain back in if desired
My config.ini settings if you’d rather look at that than the in-game menu
[Render]
Capability=DirectX12
TargetPlatform=DirectX12
UsingIndepentRenderWorker=Enable
RenderWorkerThreadPriorityAboveNormal=Enable
ParallelBuildProcessorCount=16
ParallelBuildCommandList=Enable
CentralUpdateTileMapping=Disable
AllowMeshShader=Enable
ForceMeshShader=Disable
TextureStreamingBudget=32101
[AppOption]
TargetDisplay=
RenderingMethod=Normal
WindowMode=Borderless
Resolution=3840×2160
RefreshRate=60.00Hz
ImageQualityRate=10
VSync=ON
FrameRate=Max60
FoliageQuality=High
EffectQuality=High
MeshQuality=HIGHEST
TextureQuality=High
TextureSamplerQuality=Anisotropic16
StreamingTextureQuality=High
StreamingTextureBufferSize=-03_0
ShadowQuality=Highest
ShadowCacheEnable=ON
ContactShadowEnable=ON
BloomEnable=ON
DepthOfFieldEnable=ON
MotionBlurEnable=OFF
LensFlareEnable=ON
LensDistortionSetting=OFF
FilmGrainEnable=ON (3/24/2026 – can use RenoDX or Graphics Suite Lite to remove this instead)
AntiAliasing=FXAA_TAA
AOEnable=DFAO
SSREnable=ON
SSSEnable=ON
UpscalingAlgorithm=DLSS
UpscalingQuality=MaxPerformance
UpscalingSharpness=5
RayTracingEnable=ON
PadButtonIconType=TypeB
DynamicResolution=OFF
DLSS=MaxPerformance
TextureQualityAndStreamingTextureBufferSize=High__03_00
DLSS_FrameGeneration=OFF
DLSS_Reflex=Off
MotionQuality=High
FSR3=None
[Render/SoftParticles]
SoftParticles=Enabled
StreamingSettings
PriorityAsyncLoadingExtraTime=50
AsyncLoadingTimeLimit=500
MaxNumAsyncLoadRequests=15
Reframework
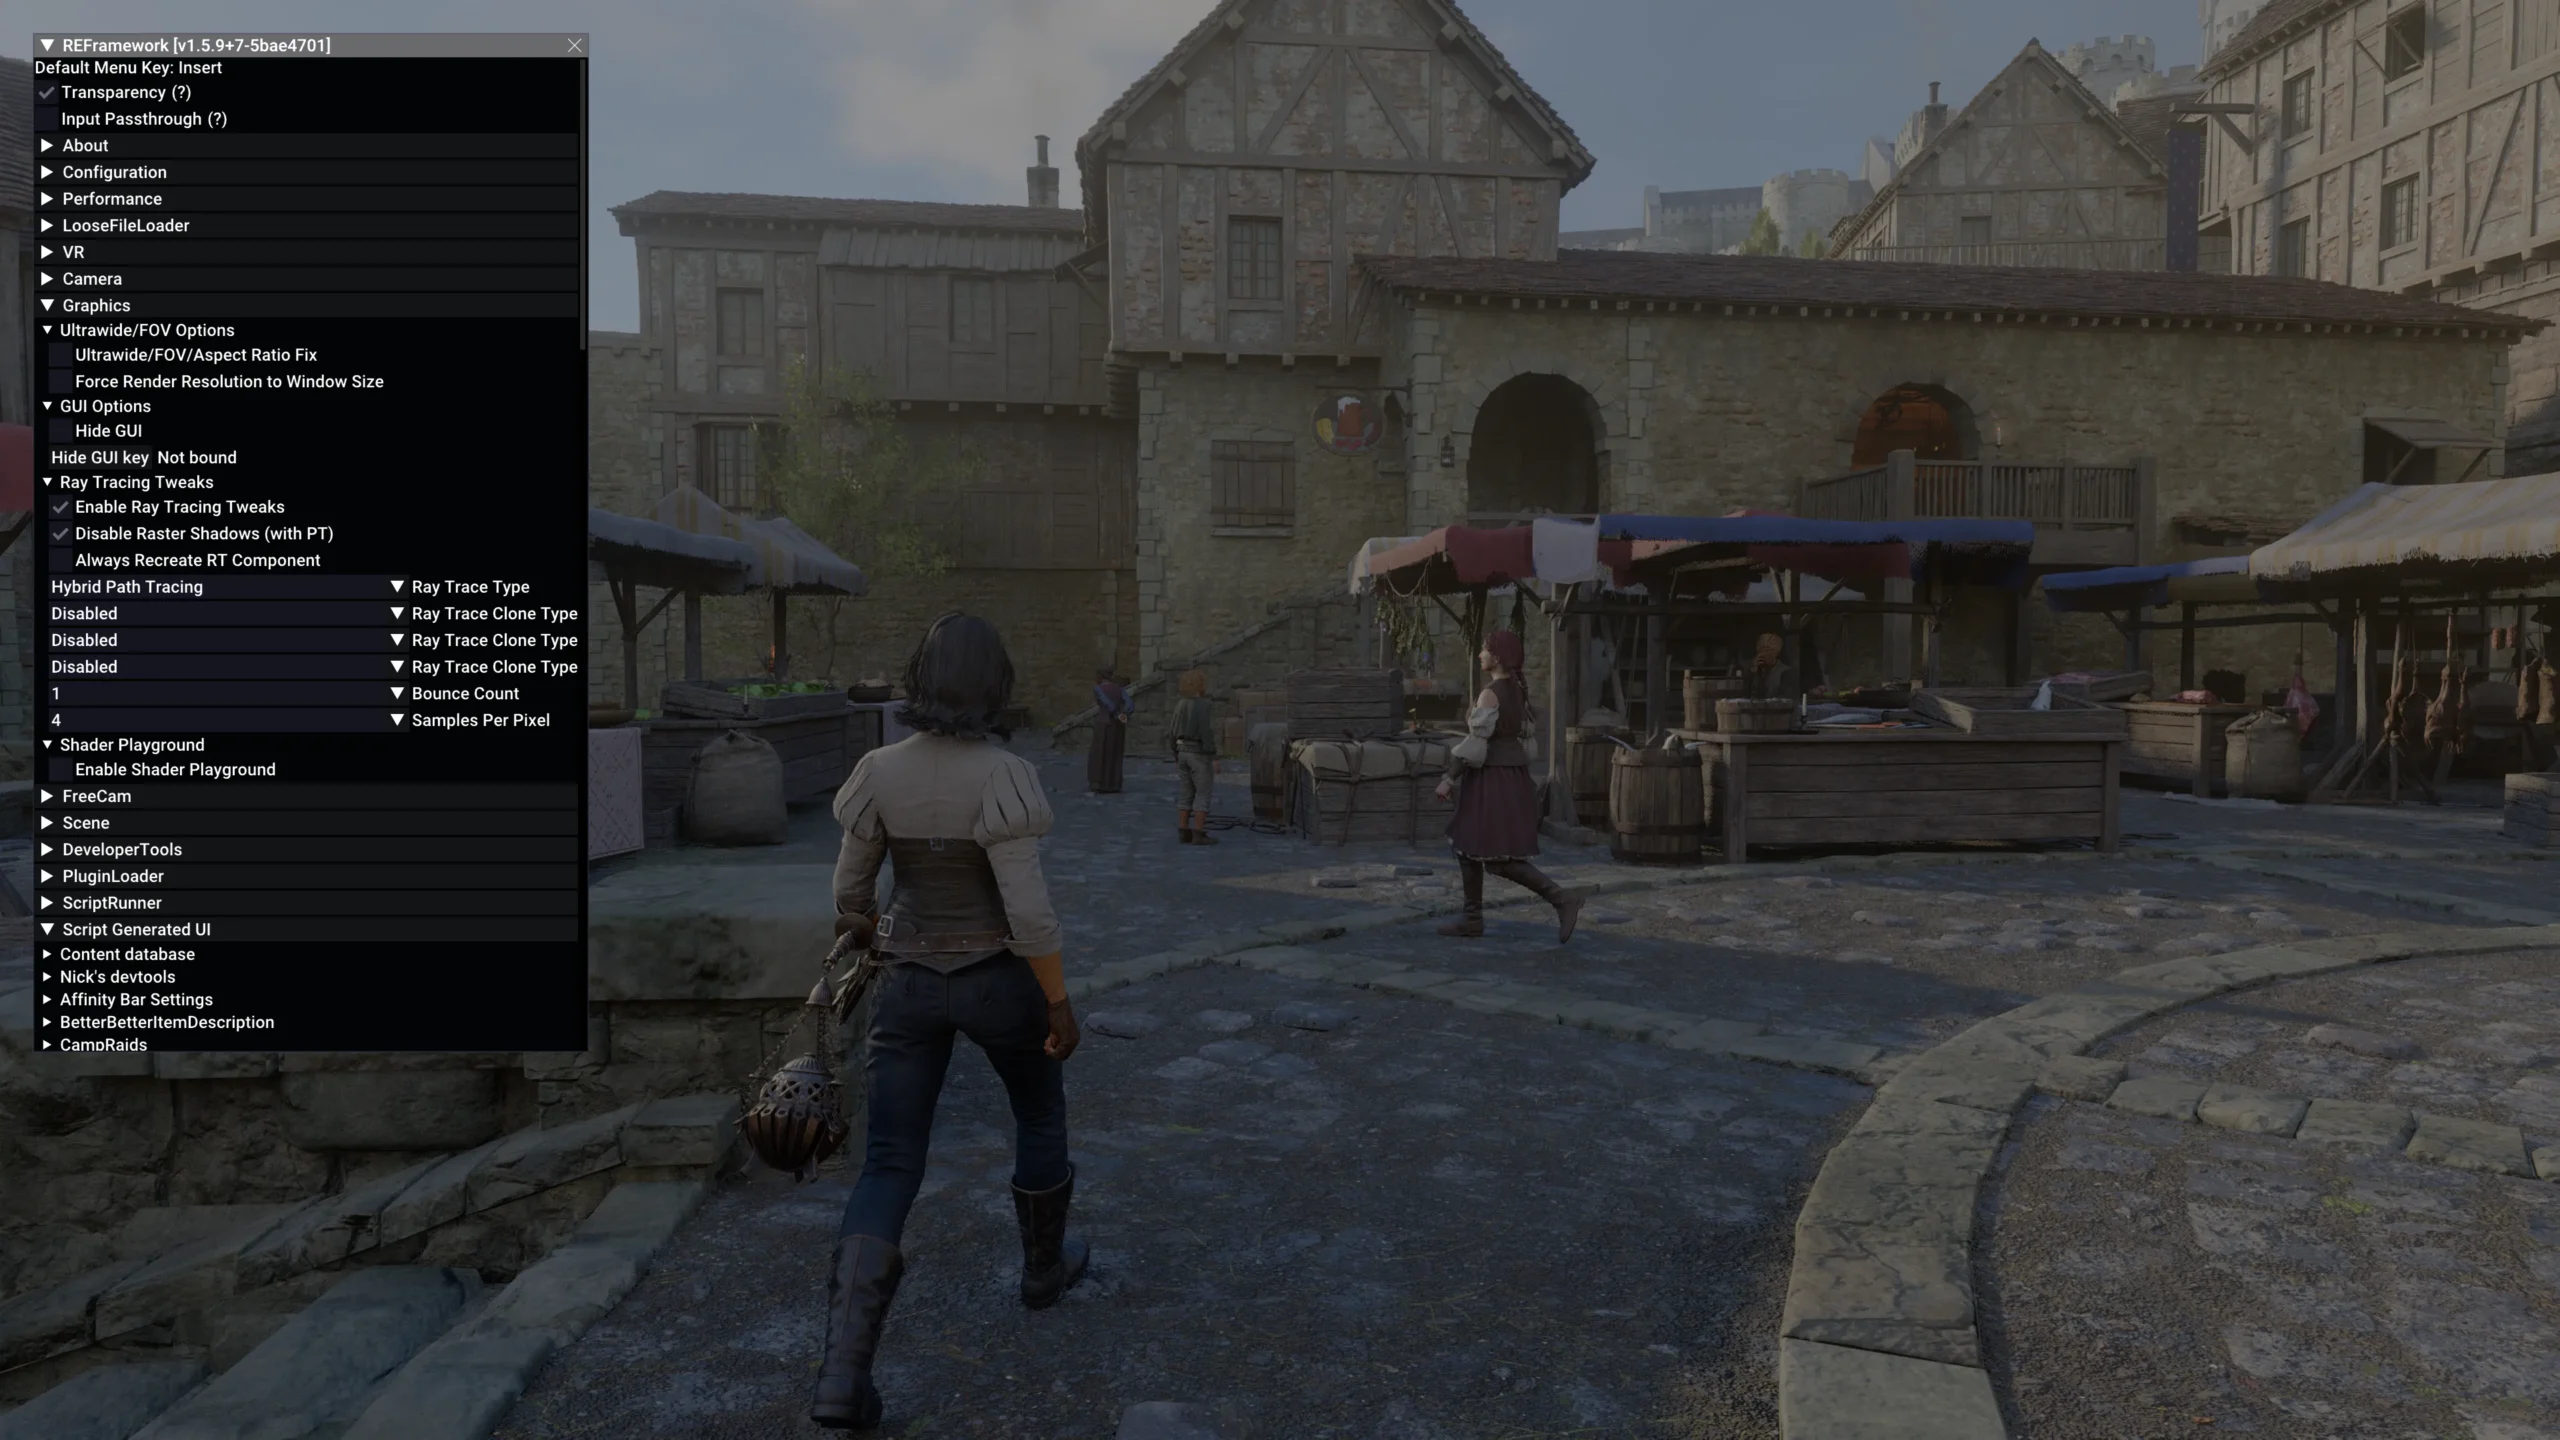
Graphics:
Hybrid Path Tracing
- 4spp
- 1 bounce
Using Hybrid Path Tracing over Pure Path Tracing because of the loss of shaders in Pure aka no subsurface scattering resulting in rougher skin, weapons losing their lighting effects, high GPU cost. PT Sun Fix is useful here too for reducing the more intense sunlight present in this mode.
4spp (samples per pixel) is reduces noise the most, but is resource intensive.
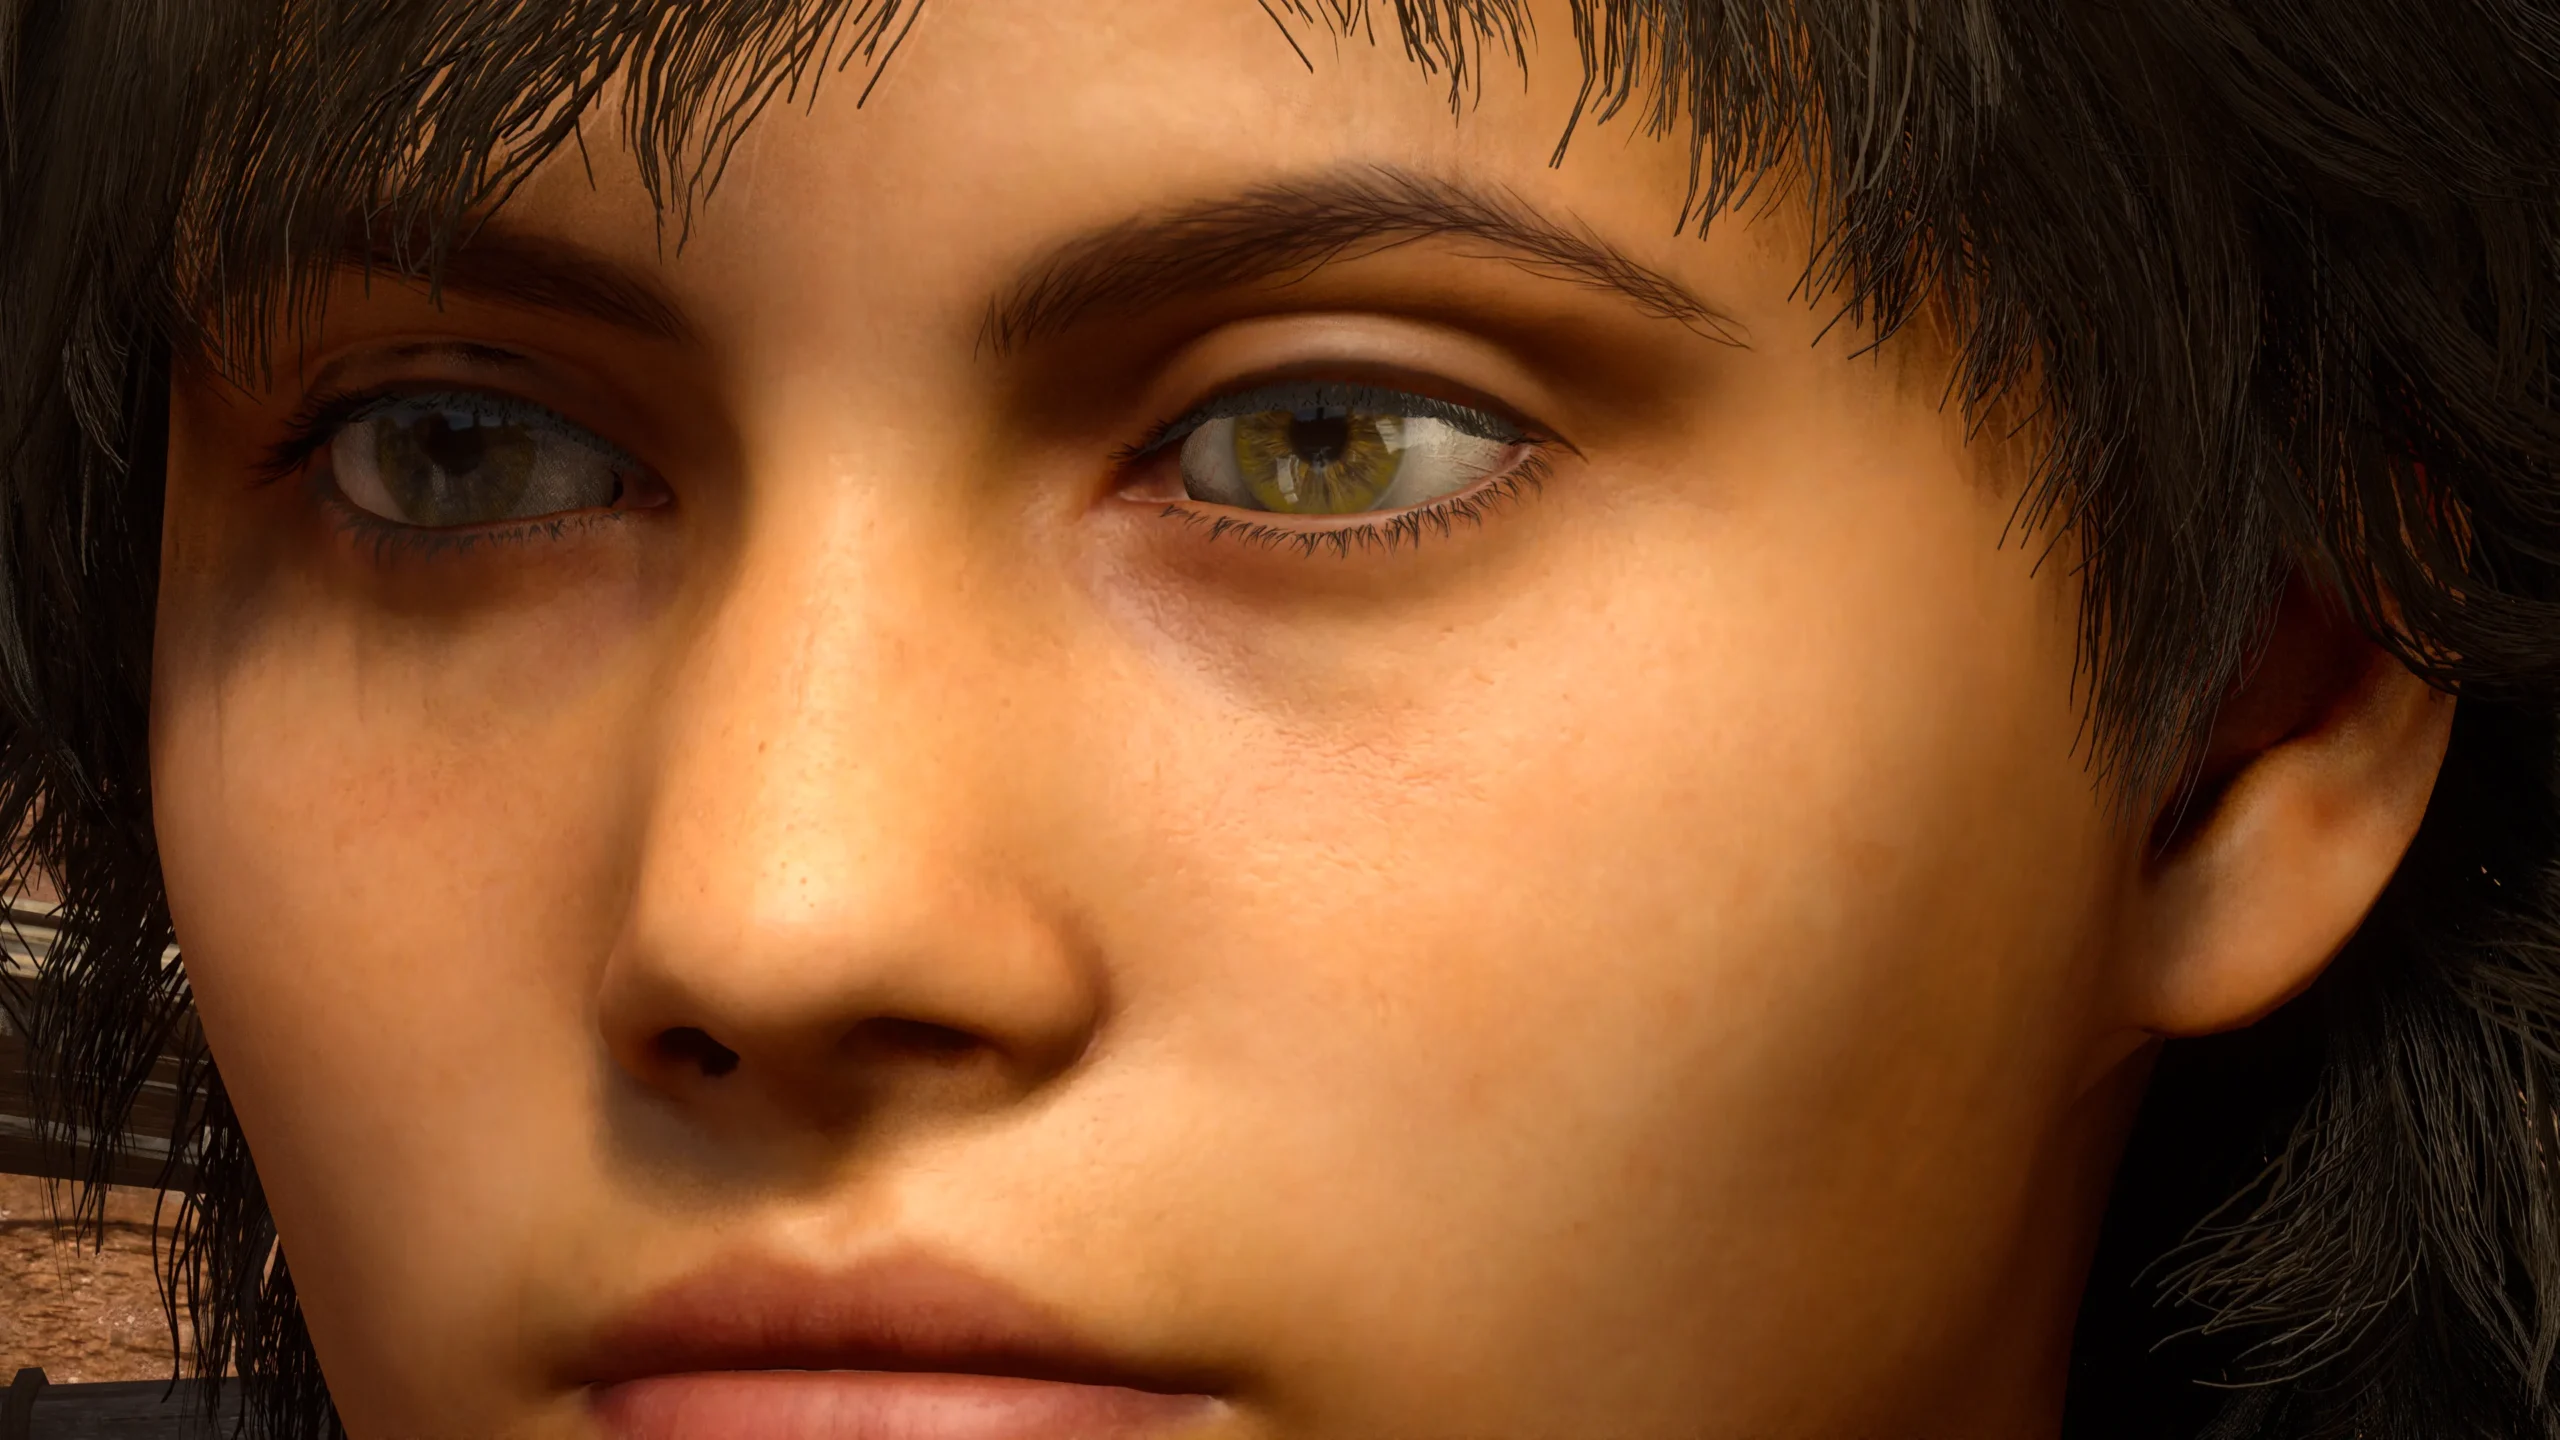
2 bounce is more resource intensive, though it does lighten some areas/reduce weird shadows. On the other hand, it seems to get closer to the vanilla raytracing look and the eyes kind of lose that nice sparkle
Bounce comparison
https://imgsli.com/NDQ3OTAy/
https://imgsli.com/NDQ3OTM0
ASVGF/Vanilla Raytracing
Noted that at night/indoors, ASVGF is superior. Hybrid Path Tracing brightens light sources too much. Pure Path Tracing looks great! But the GPU cost is still intense on top of loss of shaders etc
Hybrid PT + ASVGF vs Hybrid PT only
I forgot to add an ASVGF comparison I think
https://imgsli.com/NDQ2Nzgz
Graphics Suite Lite:
General Improvements:
- Better Clouds=Enabled
- Better GI Point Cloud=Enabled
- Exposure=Enabled
- Local Exposure=Disabled
Local Exposure kind of flattens the picture, not really a fan of it - Image Post Processing=Disabled
- Disable Character Spot Light=Disabled
- Adjust Lantern Position=Enabled
- Disable Lantern Backlit Spot Light=Enabled
- Better SSS Diffusion=Enabled
- Denoise Strength=Strong
- Water SSR Quality=Enabled
Subsurface Scattering Strength comparisonhttps://imgsli.com/NDQ3MjIw https://slow.pics/c/bYI7Ahnj
Better Shadows
- Shadow Quality=High
- Shadow Resolution=Highest
- Actual Contact Shadows=Enabled
- Swing On Shadow Enable=Enabled
- Better Shadow Filter=Enabled
- Disable Shadow Caster Culling=Disabled
- Shadow Variance Scale=Enabled, Scale set to 2.000
Shadow Quality and Texture Quality help smooth out the edges of shadows and reduce flickering. I tried setting Shadow Quality to Highest and the difference from High is minute so I’ll stick to High. However I also set Shadow Resolution to Highest to reduce the flickering as well so maybe the opposite is true
RT Improvements
- RT/PT: Secondary Diffuse Bounce=Enabled
- RT/PT: Use Alpha Test=Enabled
- RT/PT: RayTracing Resolution (ResRatio)=Enabled
- 1.000 Strength
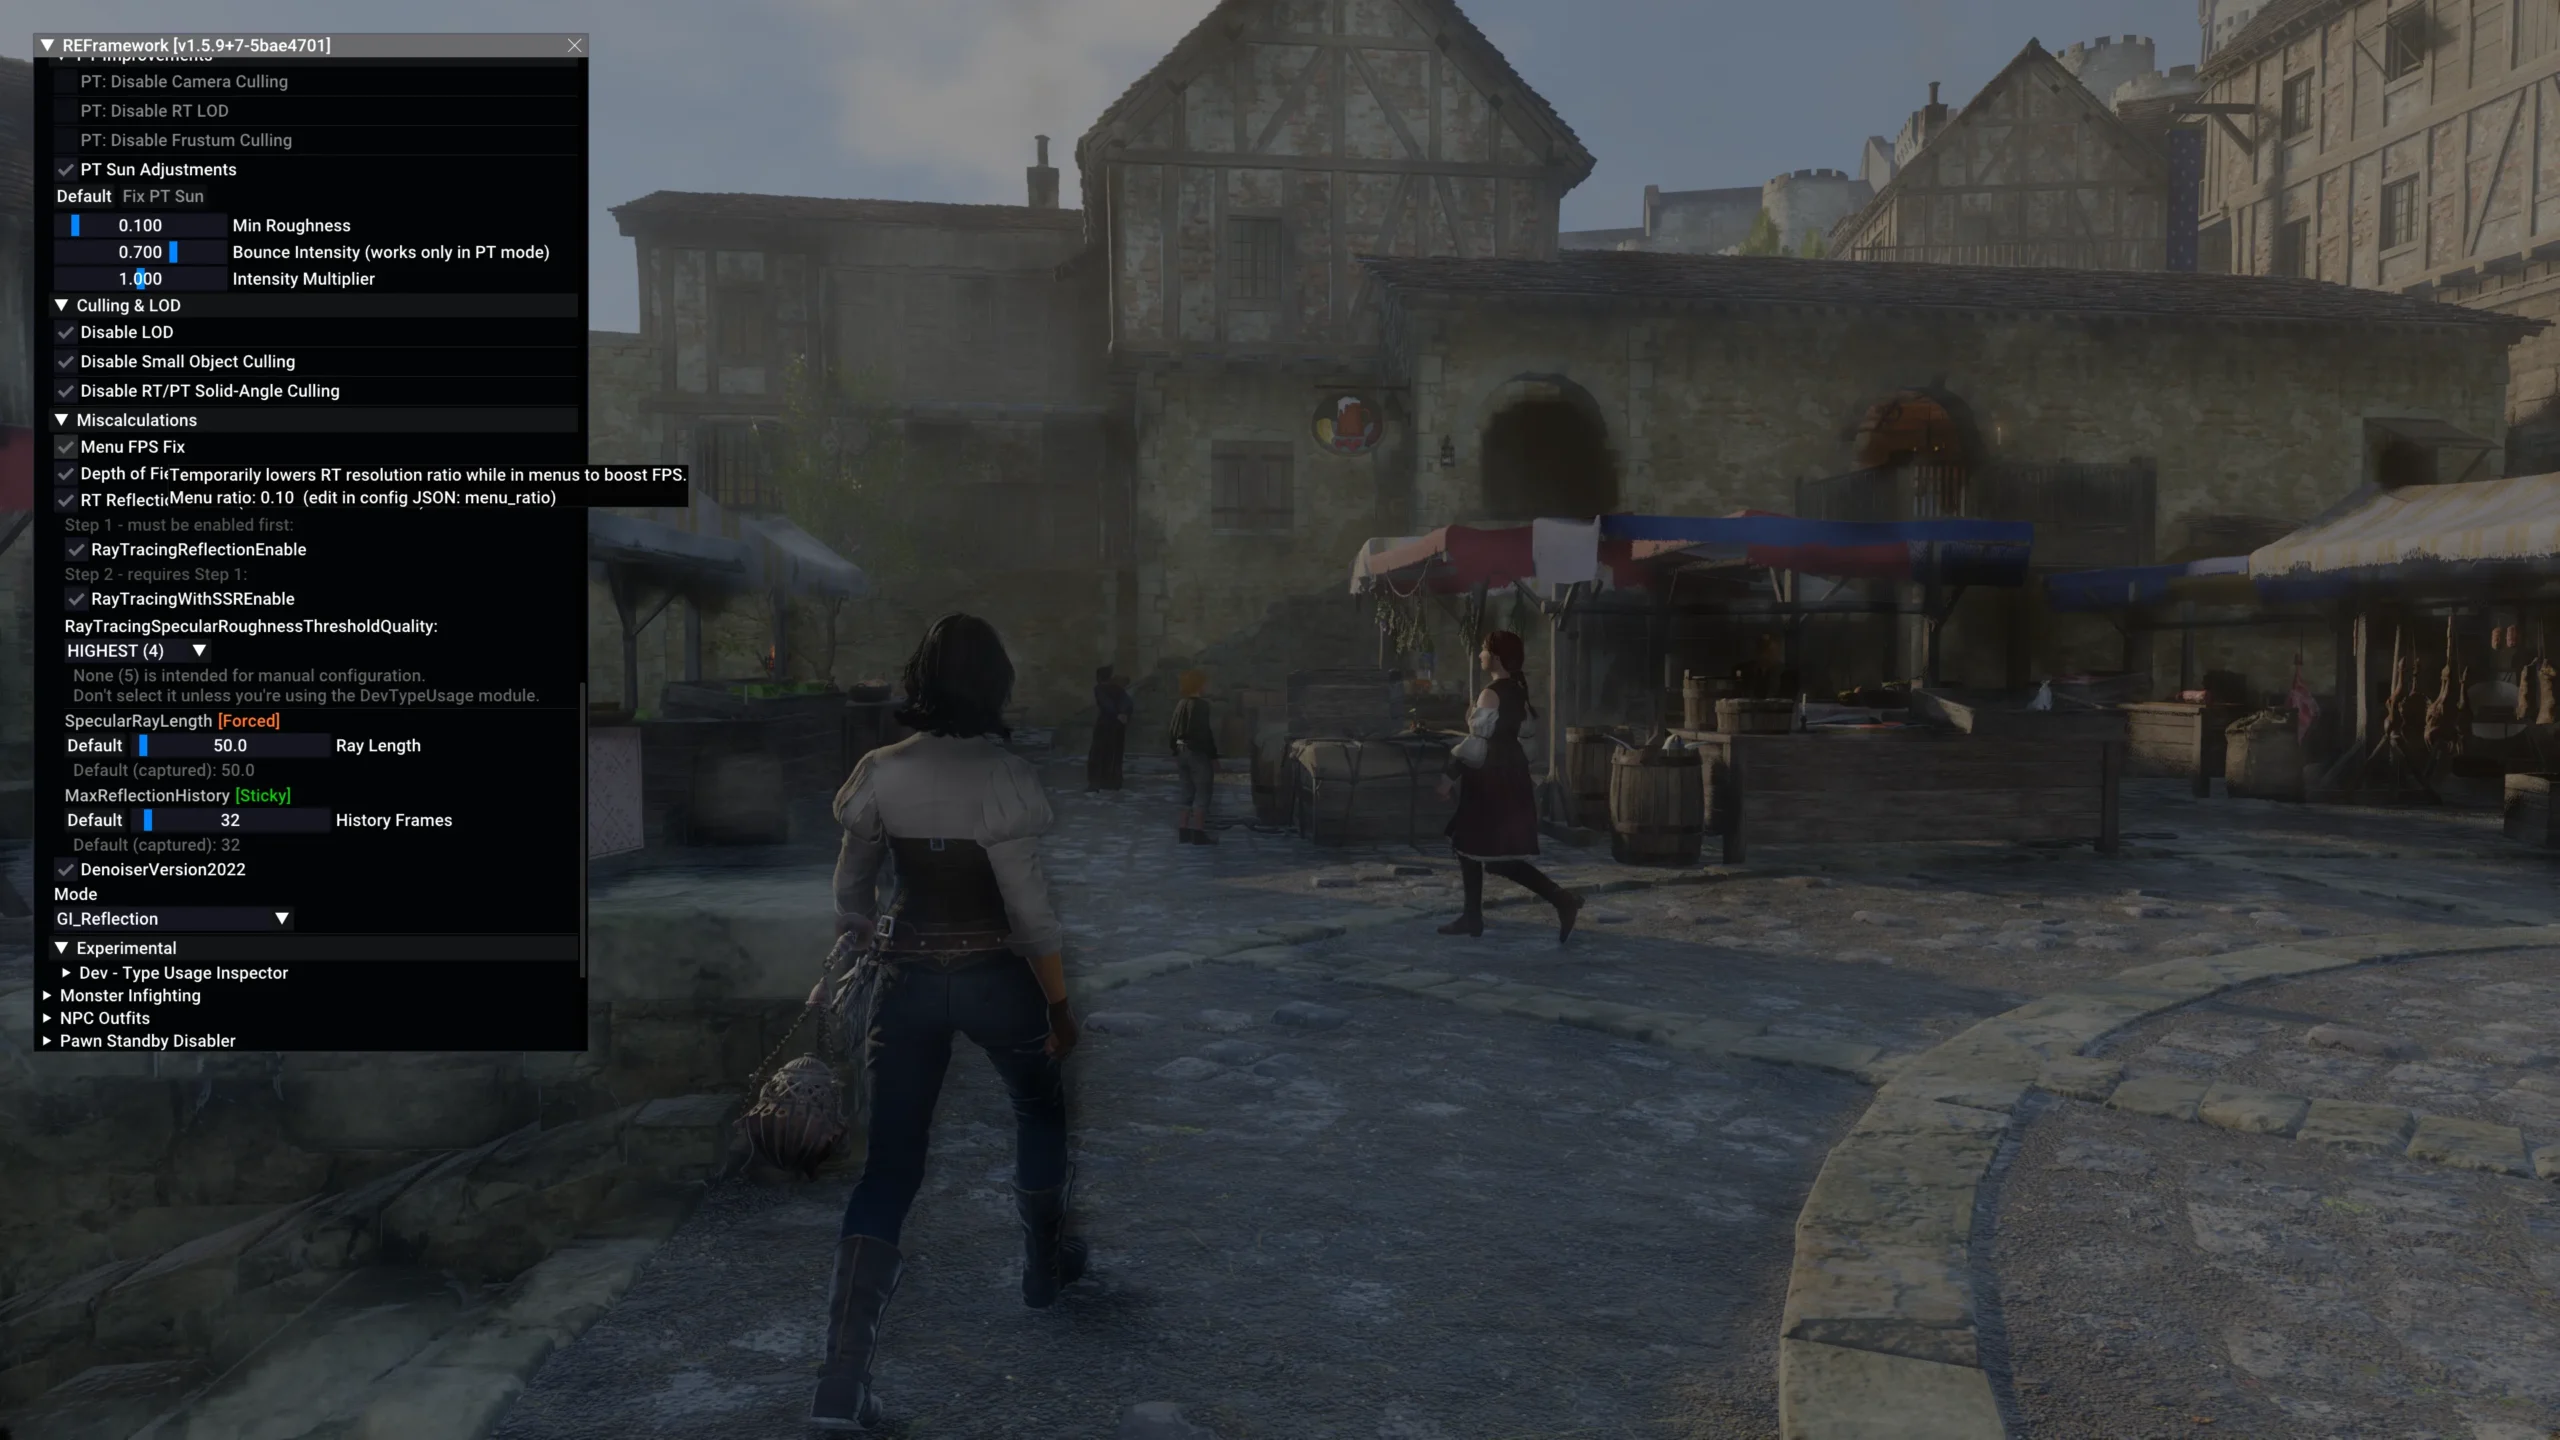
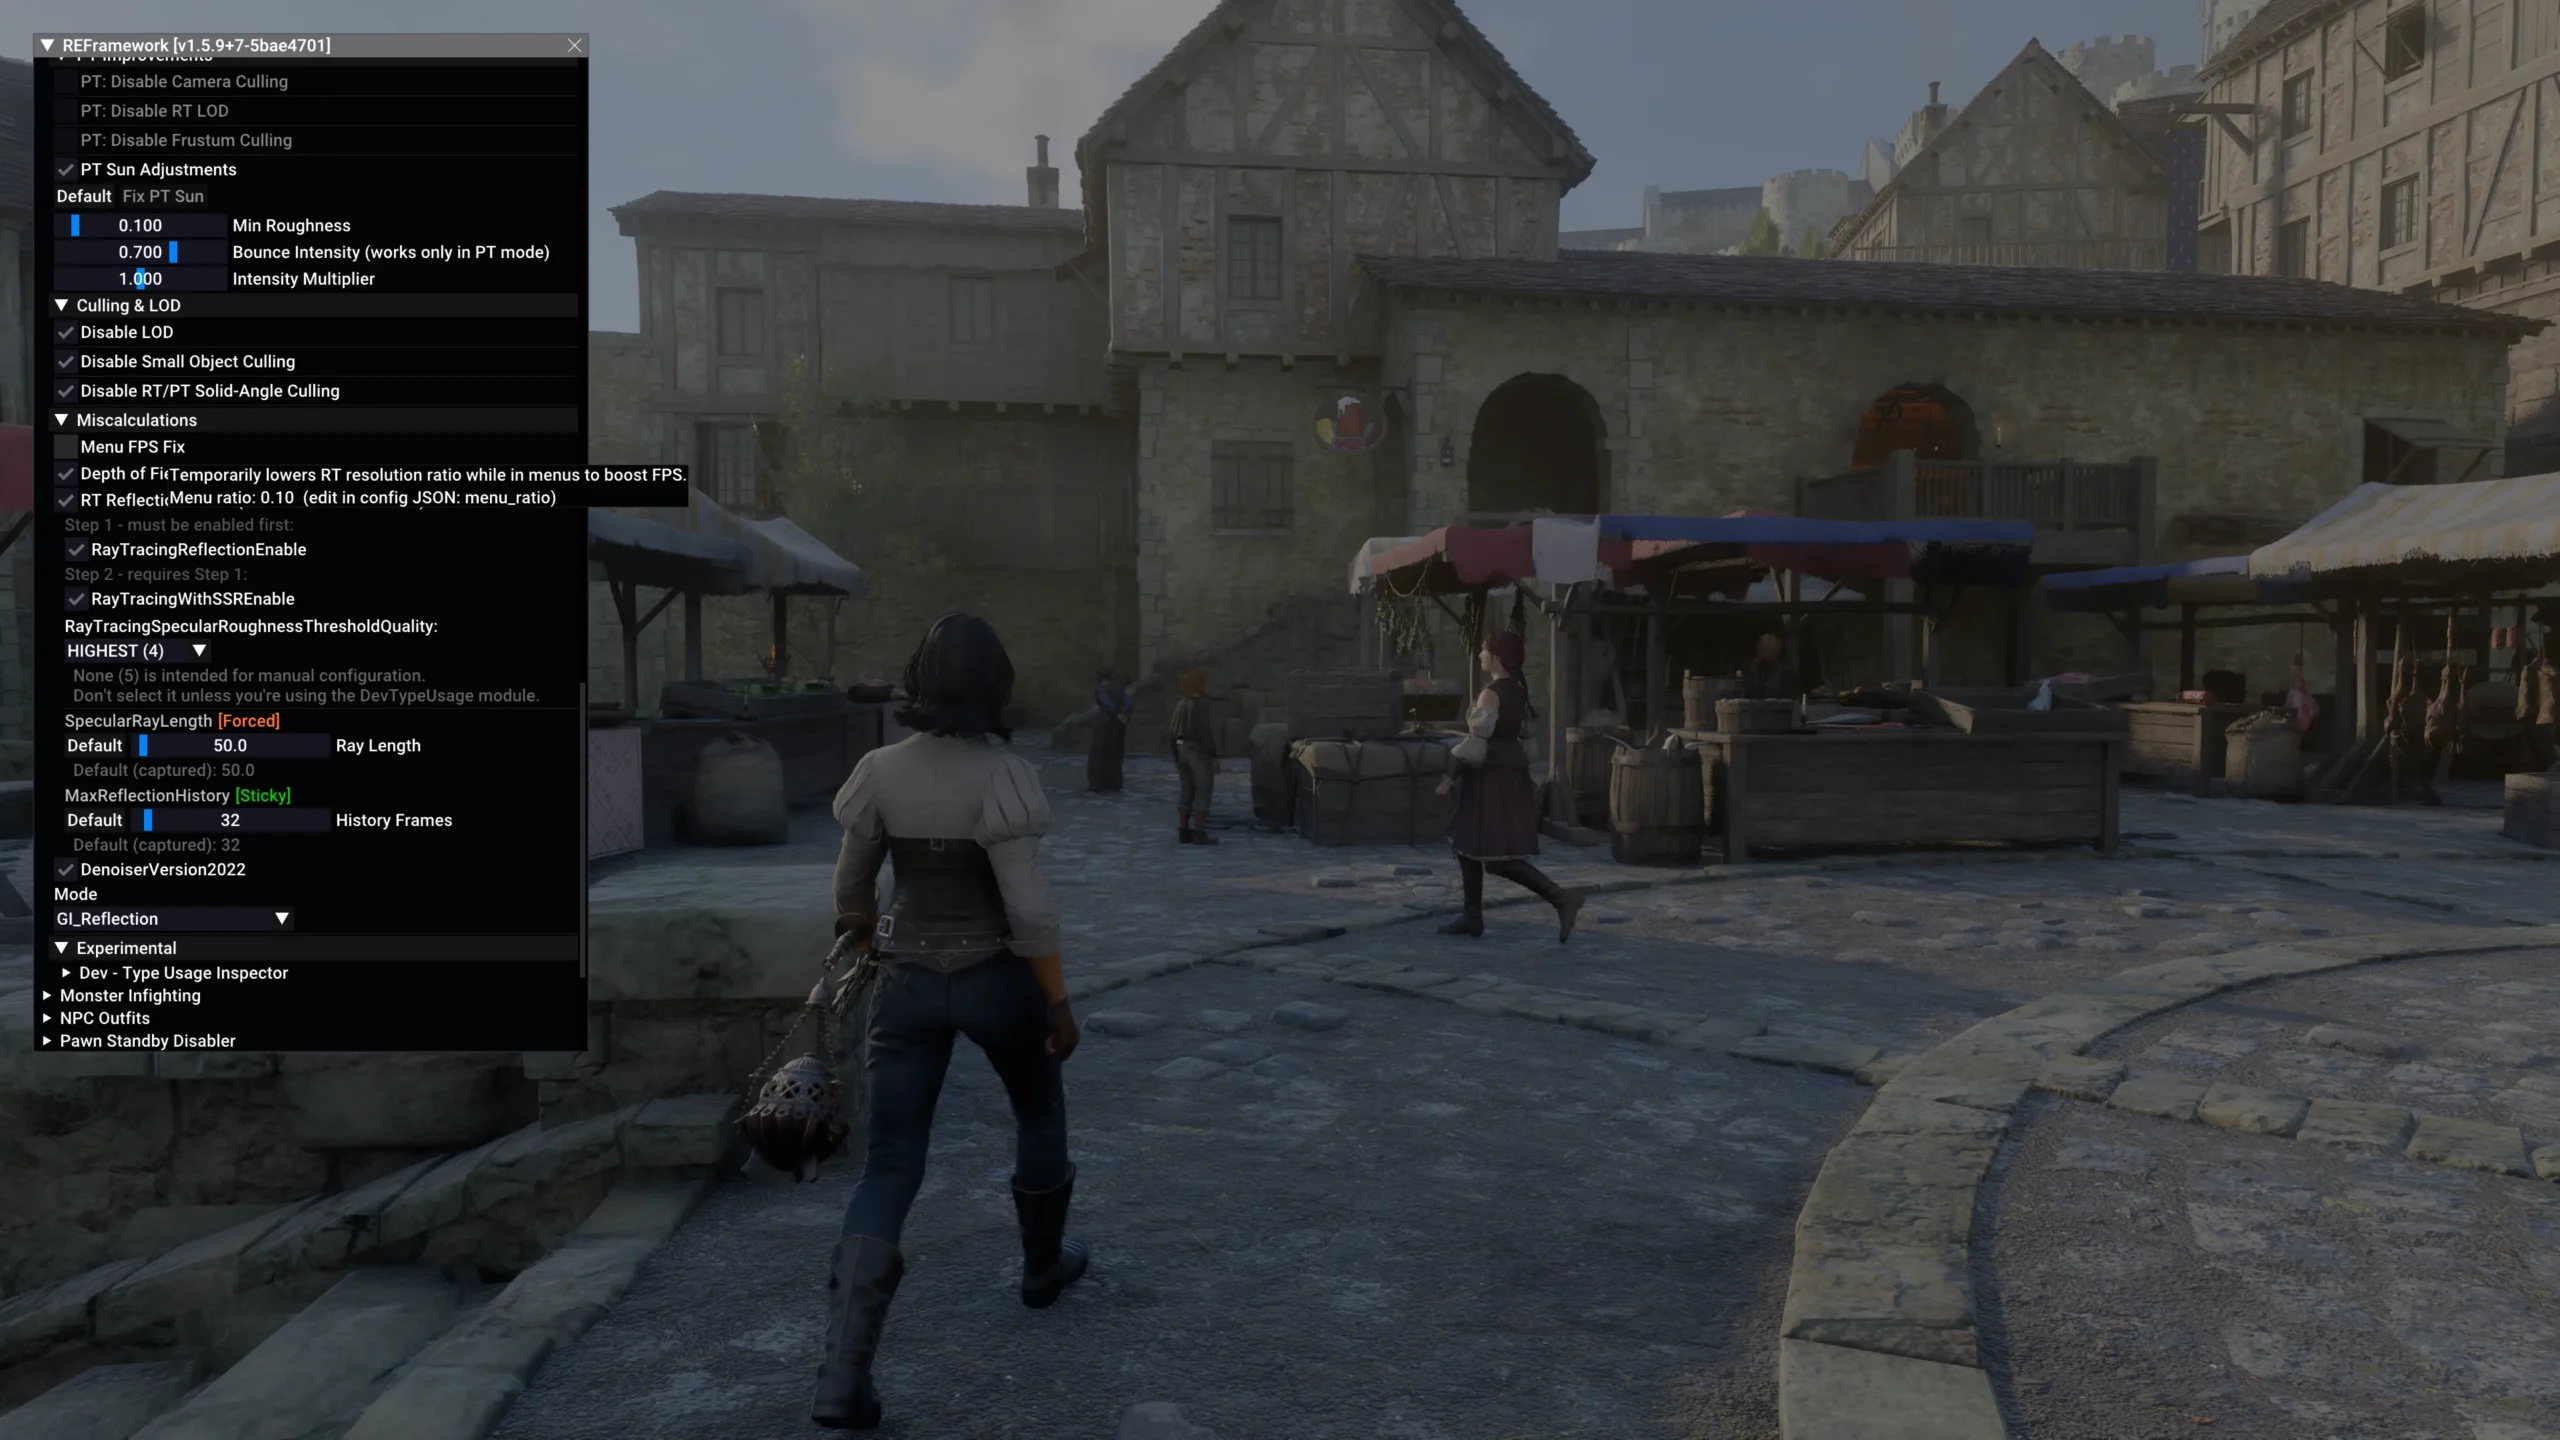
PT Improvements
Hybrid Path Tracing
- PT Sun Adjustments=On
- 0.1 Min Roughness
- 0.7 Bounce Intensity
- 1.0 Intensity Multiplier
ASVGF/Vanilla Raytracing
- PT Sun Adjustments=On
- 0.1 Min Roughness
- 1.0 Bounce Intensity
- 1.0 Intensity Multiplier
Bounce Intensity affects the lighting in shadowed areas. Higher values lighten the shadows and add more color since more light is present, but may result in glowy looks in path tracing, which is why I have it reduced with path tracing on. It does work in raytracing! But I think it’s more subtle than in path tracing
Culling & LOD
- Disable LOD=Enabled
I remember in the original Graphics Suite it was recommended to disable LOD. What it specifically said: - Disable Raytracing LOD for more accurate Path Tracing Shadows without weird geometry bugs
- Disable Small Object Culling=Enabled
- testing
- Disable RT/PT Solid-Angle Culling=Enabled
- testing
Miscalculations
- Menu FPS Fix=Disabled
- Depth of Field=Enabled
- RT Reflection + SSR=Enabled
- RayTracingReflectionEnable=Enabled
- RayTracingWithSSREnable=Enabled
- RayTracingSpecularRoughnessThresholdQuality=Highest (4)
- 50 SpecularRayLength
- 32 MaxReflectionHistory
- AggressiveDenoise=Disabled
AggressiveDenoise is disabled because it can cause some shadow flicker usually on characters. It bothers me so it’s off. jk flicker still exists idk it can stay on or off whichever works
Note that having the Menu FPS Fix will reduce the RT quality in photo mode. If you want to have quality pictures.
I’m GUESSING that the Menu Fix exists because VRAM usage spikes when entering and exiting the menu smh. I saw my VRAM usage jump from 14gb to the limit on my 4070Ti Super causing massive stutter and from 14-16gb up to 20gb on my 5090. I keep it off because I have the VRAM headroom, but it would be good to keep it enabled and disable it when taking screenshots.
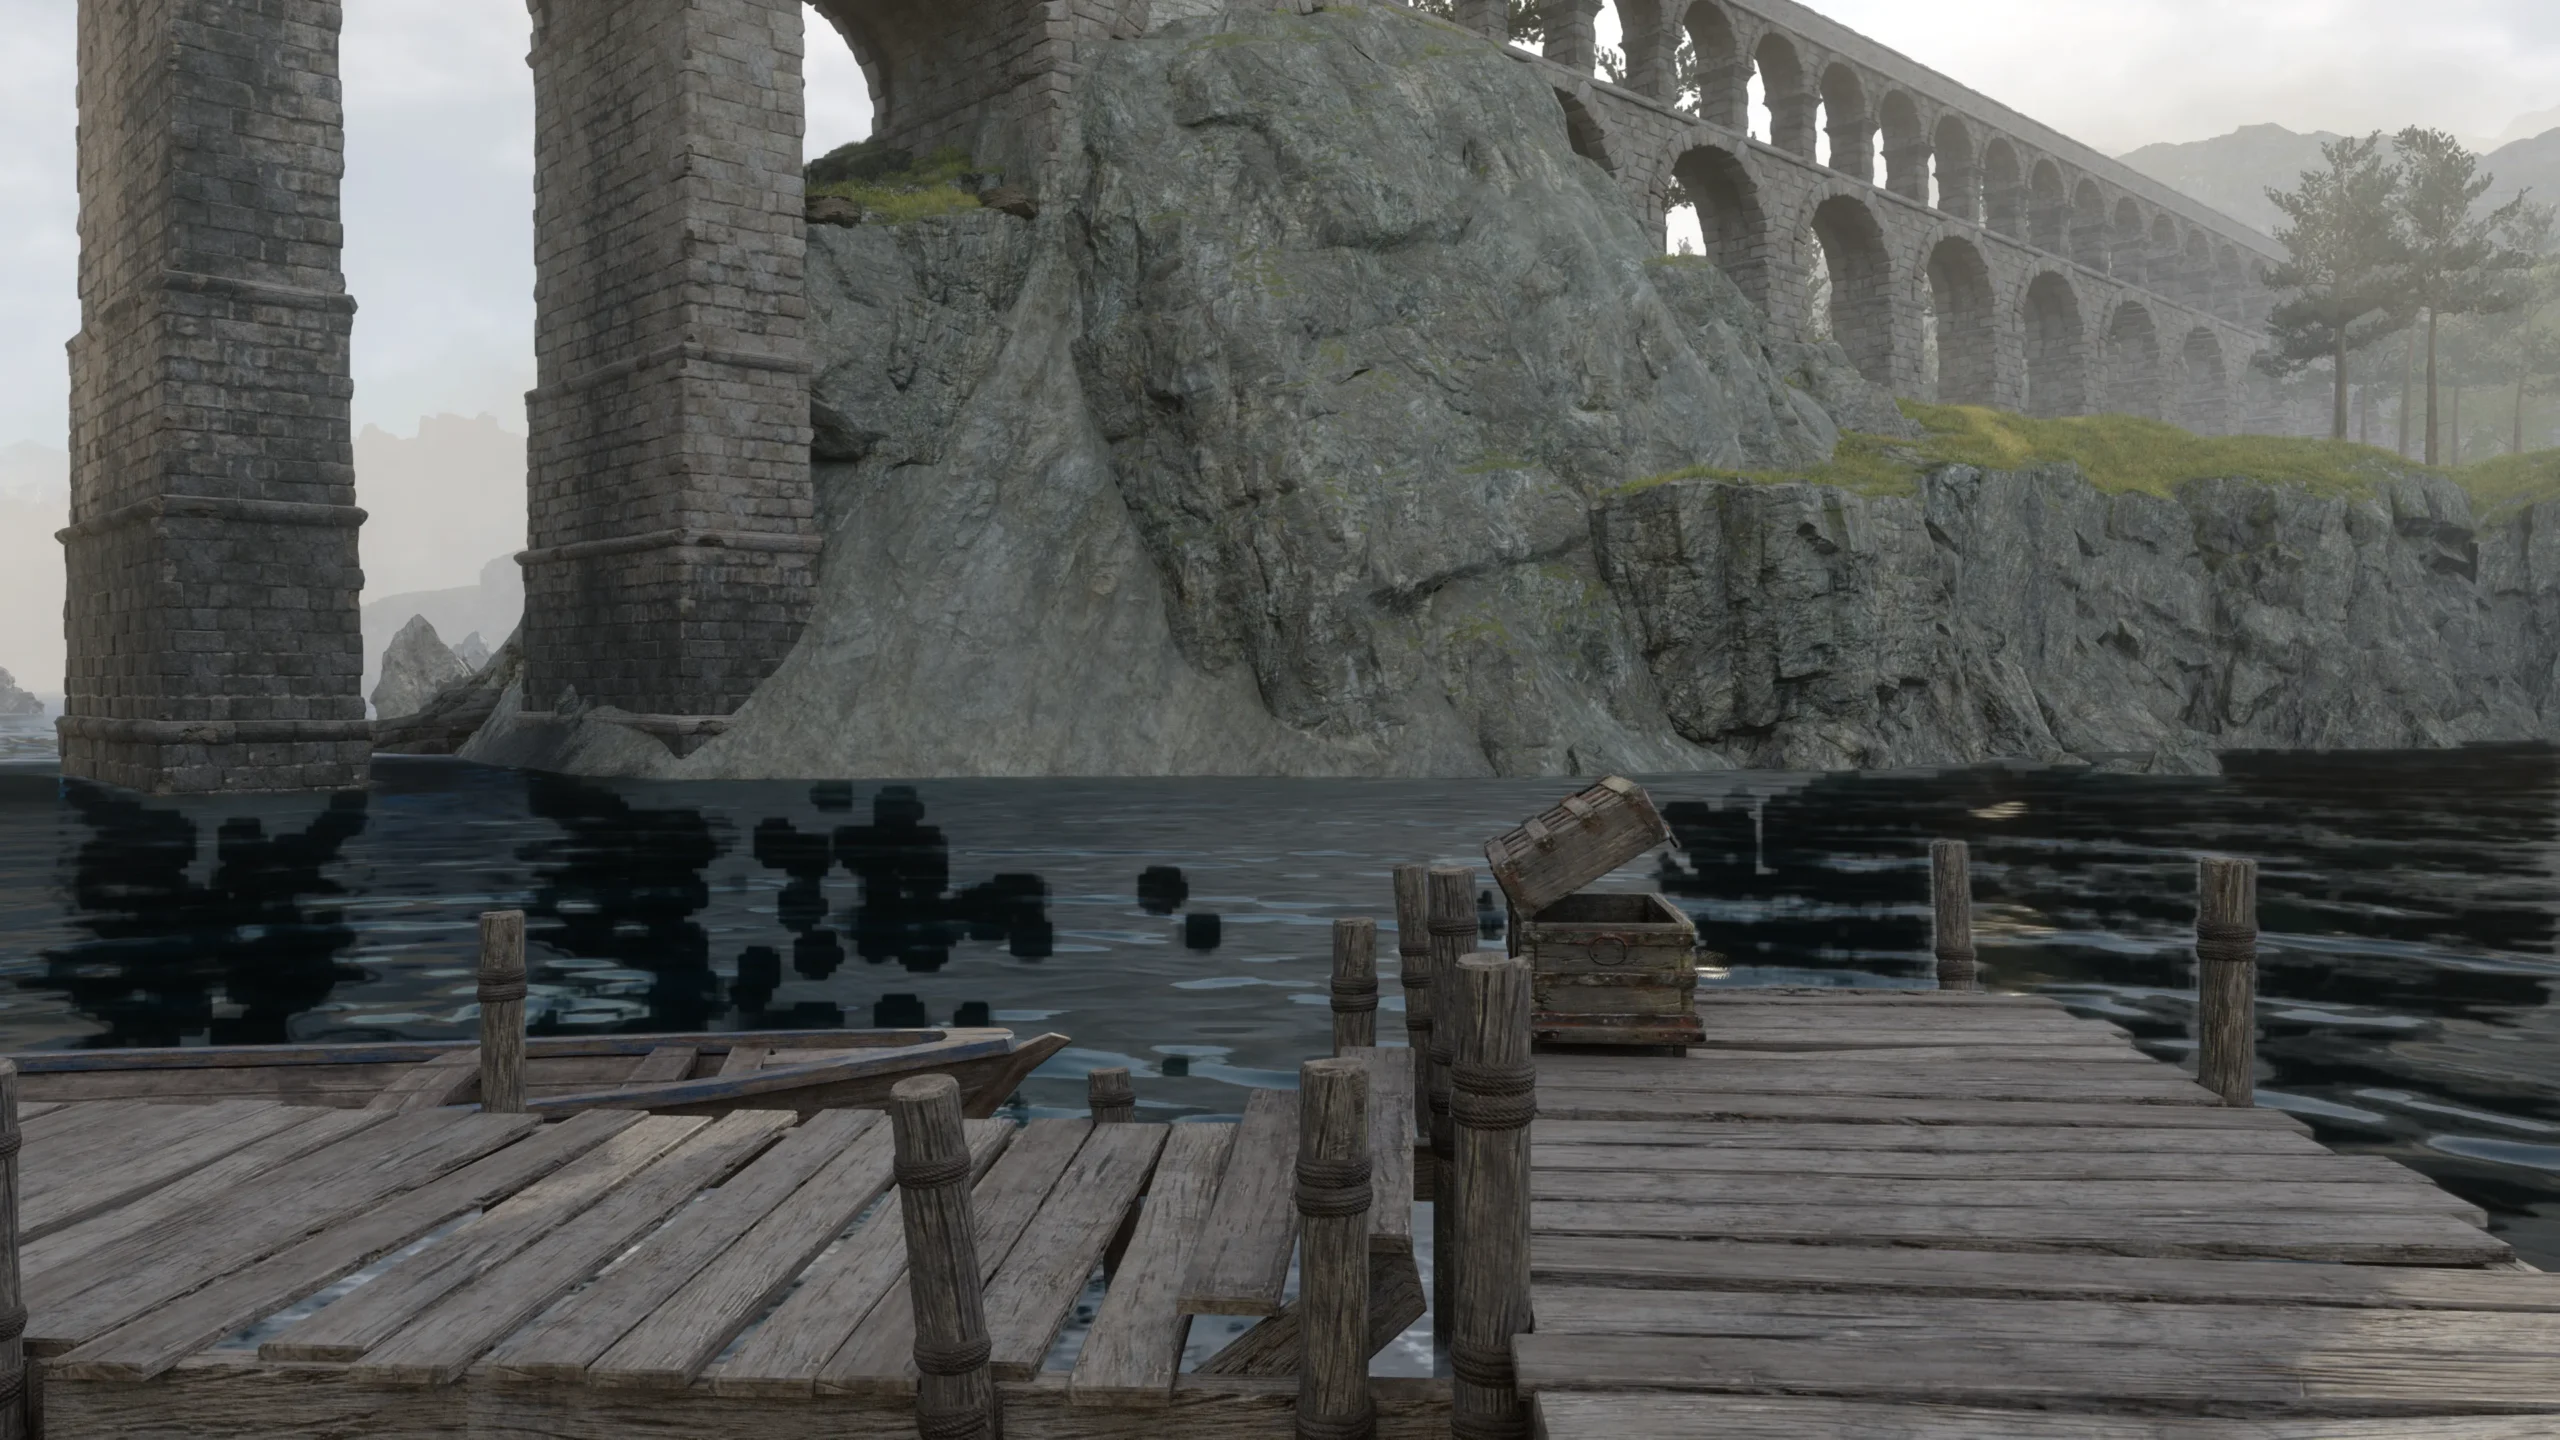
Adding RT Reflections can be way screwy as well, your discretion on whether or not you want them
RT Reflections comparison (although it bugged out pretty good from what I remember)
https://imgsli.com/NDQ3ODg5
I will say that if you still want the water reflections without the RT Reflection + SSR setting enabled, have both RayTracingReflectionEnable and RayTracingWithSSREnable both enabled then DISABLE RT Reflection + SSR. If you disable RayTracingReflectionEnable it automatically disables the SSR part and you lose the water reflections
If you want to use Path Tracing keep these toggled on anyway if you want the water reflections in large bodies of water, though it can look… weird

Denoiser2022
Available in ASVGF only
GI
- good shadows, can have this enabled only and use as a clone over path tracing, preserving more of the path tracing’s color palette
GI Reflections
- Can make the environment brighter than it should be. Can be noticeable at night like at Vernworth Castle and the city walls since there’s no moonlight. If cloned over path tracing, it brightens the entire scene, altering the color palette. With RT Reflections, everything might get this light blue sheen added to it
Custom Shadow Settings
Enable Custom Shadow Settings=EnabledShadow Filtering Mode=Better Filtering2.000-2.250 Shadow Variance Scale
Can try this or the Shadow Filtering option in Graphics Suite Lite, which appears to sharpen the edges better than the original filter setting. I like this mod because I like how the edges blur together more to reduce edge flicker. Plus it softens things in my screenshots. Replaced with Graphics Suite Lite’s shadow settings.
DD2 Utility Pack
Still testing but I lowered Max NPCs in Optimizer because otherwise it threw my CPU into overdrive. There’s more NPC pop in, but the FPS has improved 😮 Nick’s attempt to fix it up works a bit better but according to Mura it borks cutscenes. So maybe go without or stick with No NPC or NPC Limit Control
Taking screenshots
I typically utilize the Rule of Thirds and other available grids in Reshade’s Aspect Ratio shader.
Can refer to cinematography and photography for composition purposes. Very useful in my opinion, just make sure to have it loaded last so that it isn’t included in the DoF tool or the HDR/SDR Analysis Tool
Vain’s recommendations https://bsky.app/profile/v-a-i-n.bsky.social/post/3lwdnsqmehk2w
For IGCS and ReLit
As someone who takes screenshots in HDR and suffered converting all of them into subpar SDR in the Windows Photo program, Special K Image Viewer https://github.com/SpecialKO/SKIV is a lifesaver. It’s part of Special K https://www.special-k.info/ but it is a standalone program.
And that’s all I have right now.
As said before, work in progress, but I gave up because I’m working and ain’t nothing gonna happen when I work
3/12/26 – First version reposted from Tumblr – to do list: retest Utility Pack, post Pure PT with ASVGF with DLSS 4.5/Preset L, retest updated Graphics Suite, feel conflicted over ASVGF RT Reflections and will be turning them off again.
3/23/26 – Removed DD2 Utilities, replaced Better HDR for RenoDX for HDR users. RenoDX also able to replace/reduce film grain as an alternative to turning off via config.ini or Graphics Suite Lite
3/26/26 – Clarified that Clean Light is still a good Reshade preset for SDR users. Shadowfiltering mod can be dropped for Graphic Suite Lite’s Better Shadow Filter + Shadow Variance settings which achieves the same thing. Added some more about exposure and shadow settings. Added increasing shader cache if that might help any. Added AggressiveDenoise setting actually jk still flicker